How to Add a Backup Camera to a Hyundai Elantra 2012
Published September 16th, 2020 by Emily
Updated May 20th, 2021 by Emily
This is way easier than you think it is, I promise.
Please note that I made this post for free so some of the below are affiliate links
You'll need some basics...
- A backup camera (the one I used isn't sold anymore, but this should fit!)
- A display for the backup camera
- 12V cigarette plug to power the display
If you want to do it right, you'll also need...
- A soldering iron
- Mini low profile fuse taps
- Car trim removal kit
- Multimeter (that can test DC voltage)
How does it work?
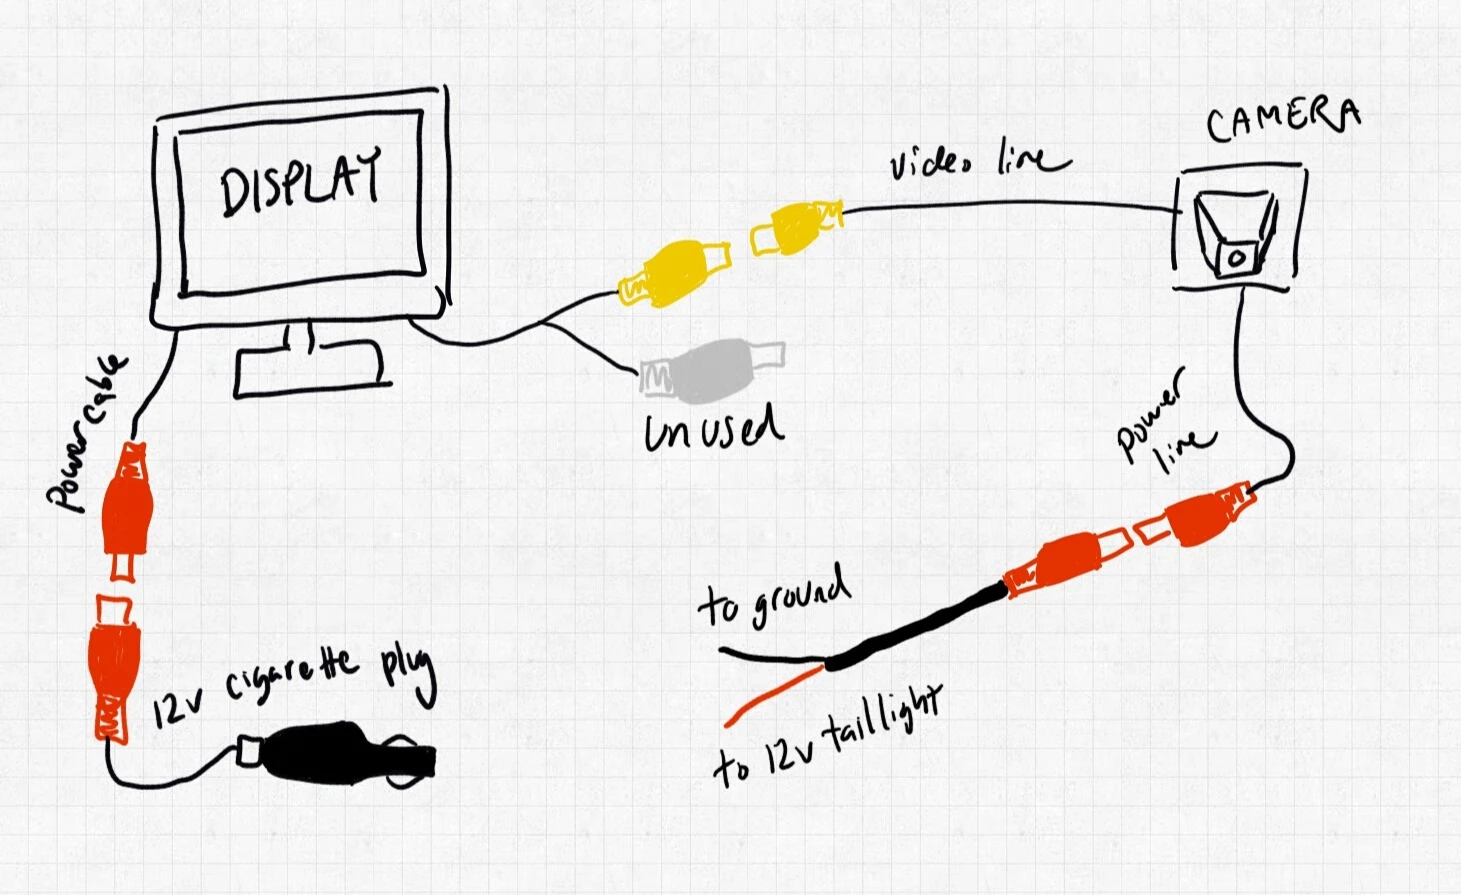
The red wire on the backup camera is the power wire. This wire requires 12 volts, and turns the camera on. Because you want the camera to only turn on when the car is in reverse, we will splice into the reverse tail light on the car, which is also a 12 volt line.
The yellow connection wire on the camera will connect to the yellow wire on the display. This wire will go through your trunk and to the front of the car. If you're lazy, you can just tuck it under the carpet. If you want to do things right, you can tuck it into the trim all the way through your car.
The red wire on the display is the power cable. You will need to connect this to a 12 volt power supply. If you're lazy, you can buy the 12 V cigarette lighter plug and you're off to the races. A better way is to tap into the cigarette lighter fuse and wire it inside the dashboard.
Install the backup camera
This part is pretty easy. Open up your trunk and remove the 12-ish screws that hold up the black carpet-looking liner. Don't lose them! Take a look at the spot that is right above where your license plate is on the outside. You'll see there are silver clips holding the black piece of plastic in place that covers the hole. Remove the plastic and insert your own backup camera.
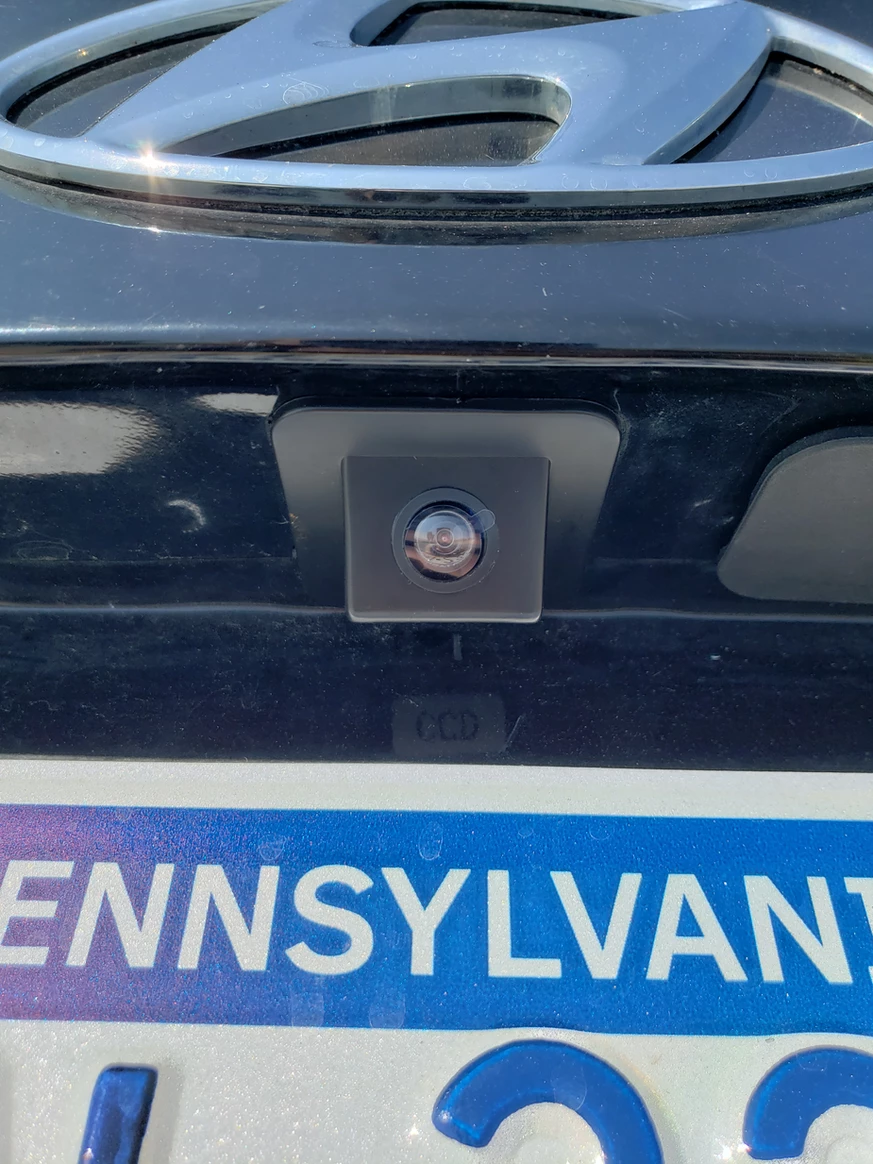
The 2012 Elantra had the option for a backup camera, which means that there is already a cut-out above your license place to install the camera. This means my camera installation will look the same as if I bought the car with the backup camera.
Wire the backup camera
Once you've clipped the backup camera in, route the wires that came with it toward the driver side. Look for the reverse light wiring pigtail.
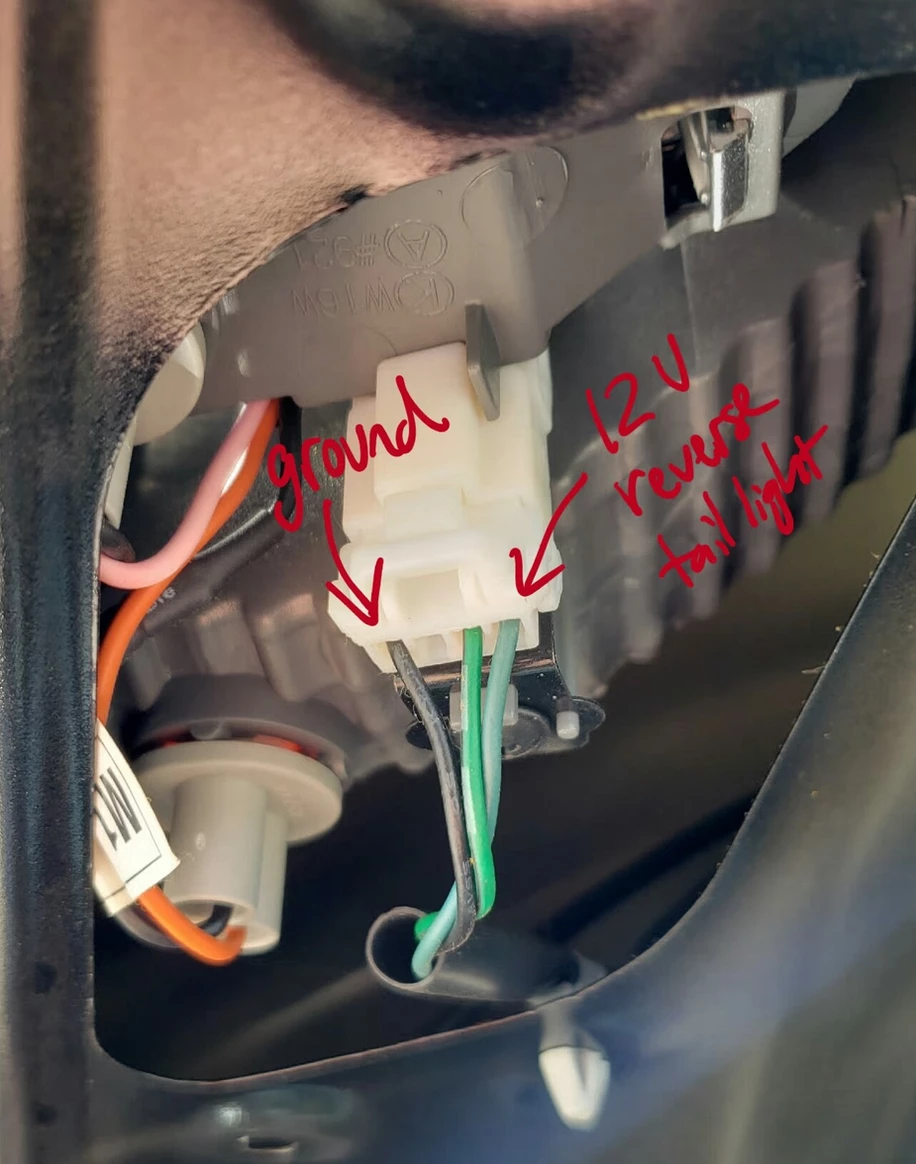
On the drivers side, there is a black wire and two other wires. They both look green, but one of them is actually blue. The black one is the ground wire, and should be attached to the black wire on your power cable. The green/blue wire that has no white or black stripes on it is the one that is the reverse tail light.
I highly recommend you verify which cable is which with a multimeter. You can do this by testing with a multimeter, between the ground and the reverse tail light there should ZERO volts when the car is on and in park, and twelve volts when the car is put into reverse. The other wire is for the regular tail lights. Those are on whenever the car is on, so that should be twelve volts all the time. If you use the regular tail lights for the backup camera's power, the camera will be on all the time, instead of just when the car is backing up.
If you don't have another person handy, theoretically you can put the car in ignition and then put it in reverse, so the lights will turn on but the car will not actually go backward. Instead, I tried shoving my multimeter probes into the pigtail and taking a video of the multimeter while I went around front to put the car into reverse. This did not work. 0/10 recommend.
I haven't soldered my connections yet, because I wasn't confident that the whole set-up would work. Instead I used a "military splice" which has held up so far and doesn't require soldering (Update August 2024: My military splice is still going strong!). It's also perfect for splicing into a wire without cutting it.
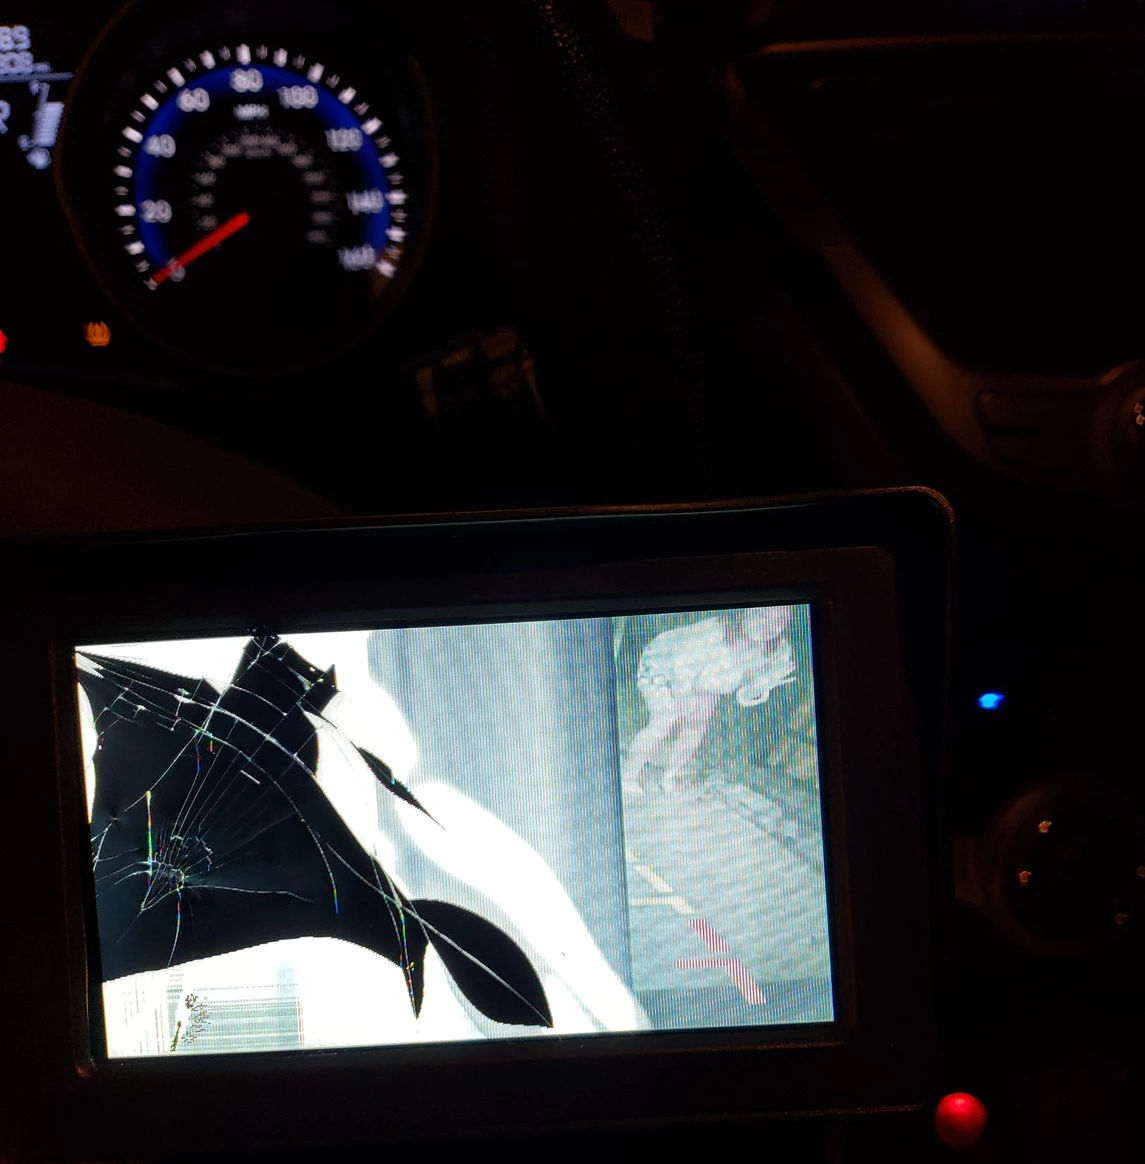
Check that everything works
At this point, you'll want to verify that your backup camera and your display is functioning. Pull down the back seats and toss the video cable to the front of the car where you display is. Plug your display in to the twelve volt cigarette plug you bought.
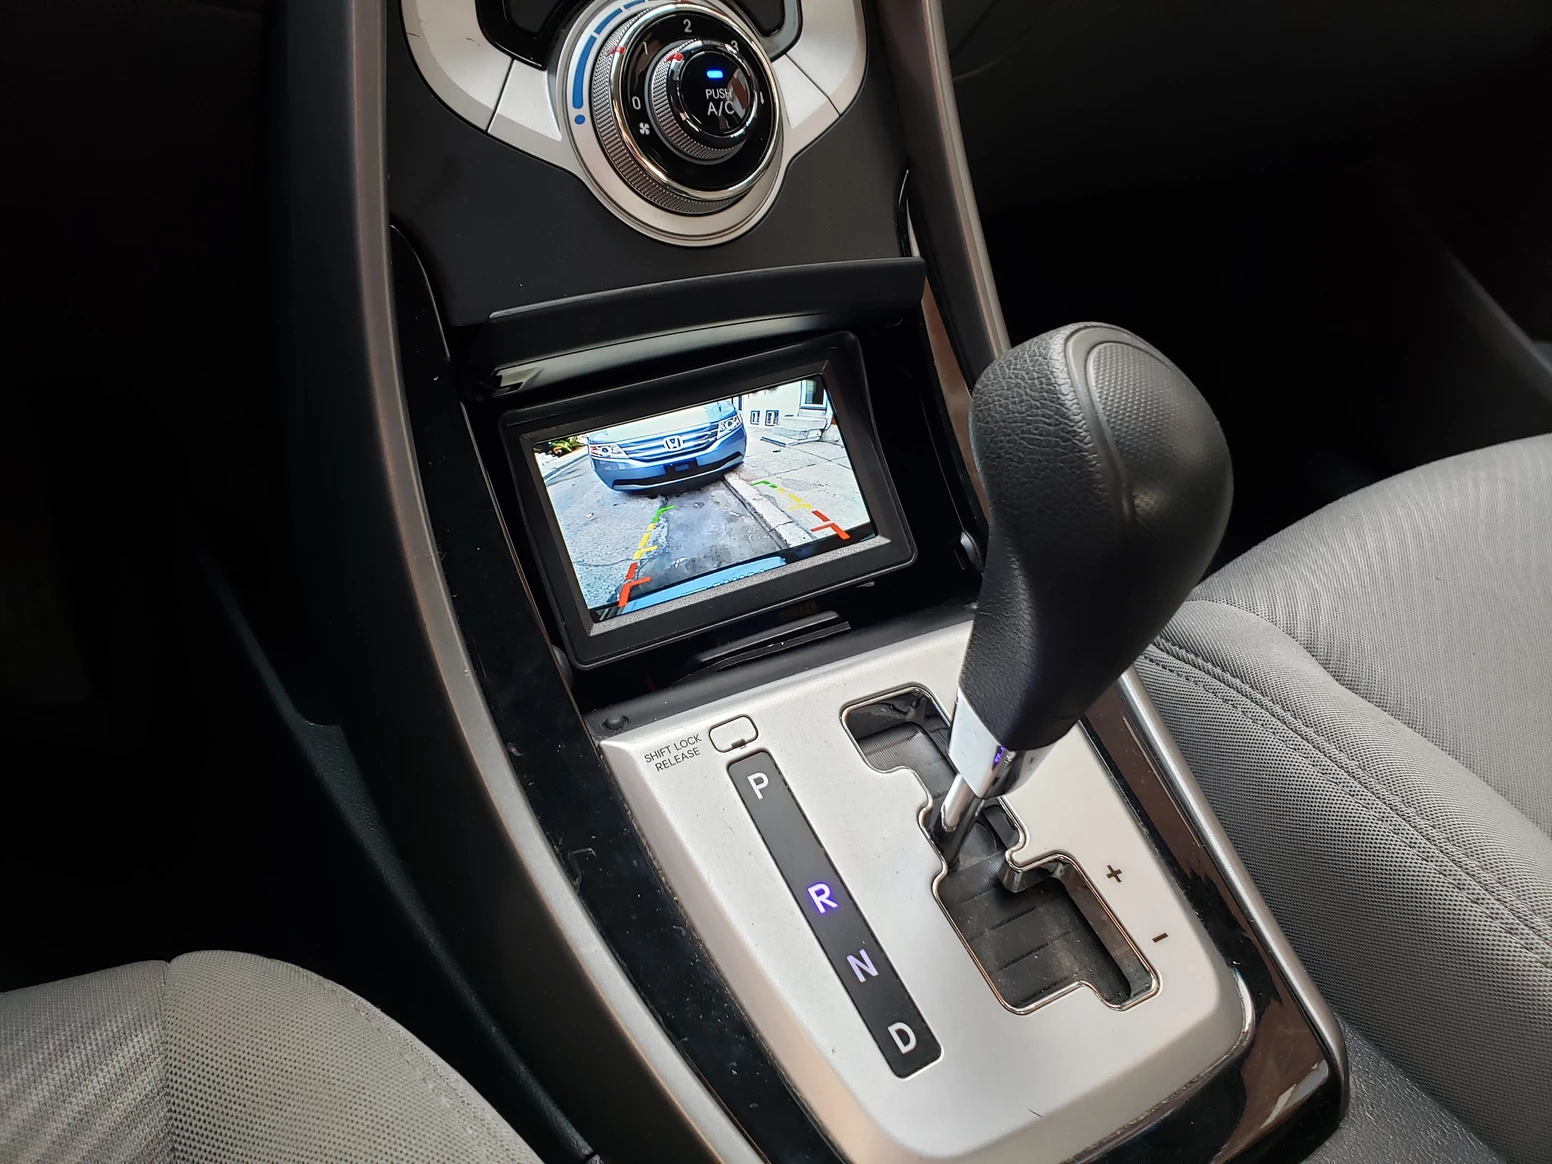
When the display is powered, but not in reverse, the display will still look like it is off. Throw the car in reverse and you should see what is behind you. My display arrived broken, but I was still able to verify that the camera worked.
Tidy everything up
At this point, it might be the middle of the night. You got everything working and you want to go home. That's fine. Just make sure to do a couple of things: make sure everything electrical is taped up and not exposed (duh), zip tie the cables to the body of the trunk, and screw the trunk lining back in. That's enough for now.
Tidy everything up.... properly
The best thing to do is to tuck all of the cables into the trim of the car. I had a difficult time with this. To get the camera video cable from the trunk to the front of the car I tucked it in the following places:
- Zip tied the cable to the trunk arm. There is another cable sleeve that I followed.
- Tucked it in to the fabric liner, following the other cable sleeve.
- I pulled down the driver side rear seat and pulled out some of the trim to push the cable through to the trim panel on the bottom of the rear door on the drivers side.
- I ended up letting the cable come out and around the seat belt trim.
- I then tucked it back under the trim on the bottom of the drivers side front door.
- The cable went up, past the hood opener interior latch, and into the dash next to the fuse box.
Be very careful around the hood opener latch. I may have broken mine simply by pulling off the surrounding trim. That is something for me to deal with in the future, however.
Once I got up to the fuse box, it met up with the display's power cable. Yes, I ended up powering the display from the fuse box, instead of using up a cigarette plug. Let me get into that...
Power the display from the fuse box
Note: even if you're planning to power the display from the fuse box, I recommend buying the 12V cigarette plug too, because it's cheap and it's an easy way to test if everything is working.
Your fuse box is located to the bottom left of the wheel. You can easily pull the panel off with your hands. The inside of the panel has a list of what each fuse does. I chose the 20A fuse that says "C/Lighter" for cigarette lighter.
I had no idea how to tap into a fuse box, so I watched this video and learned how.
The Hyundai Elantra has mini, low-profile fuses. You'll need to buy an "add a fuse" tap for mini, low-profile fuses and also another fuse that is less than 20 amps, as the video says. Follow the video to determine the orientation of the fuse tap. I also bought a wire ring that I could hook around one of the nearby screws for ground. This video (at 1:34) shows where I screwed in my ground.
I took the fuse tap and the wire ring to my desk and soldered them all together properly. Then I took them back outside and assembled everything. I took apart almost the entire dash so that I could route the video cable from the backup camera and the power cable for the display into the center pocket on my car. I took off the following things:
- Left-side shiny trim that runs up and down the entire dash, between the vent and the radio.
- Some trim to the left of the vent.
- The vent.
- The trim that touches the driver's door when the door is closed.
- The trim that is around the fuse box.
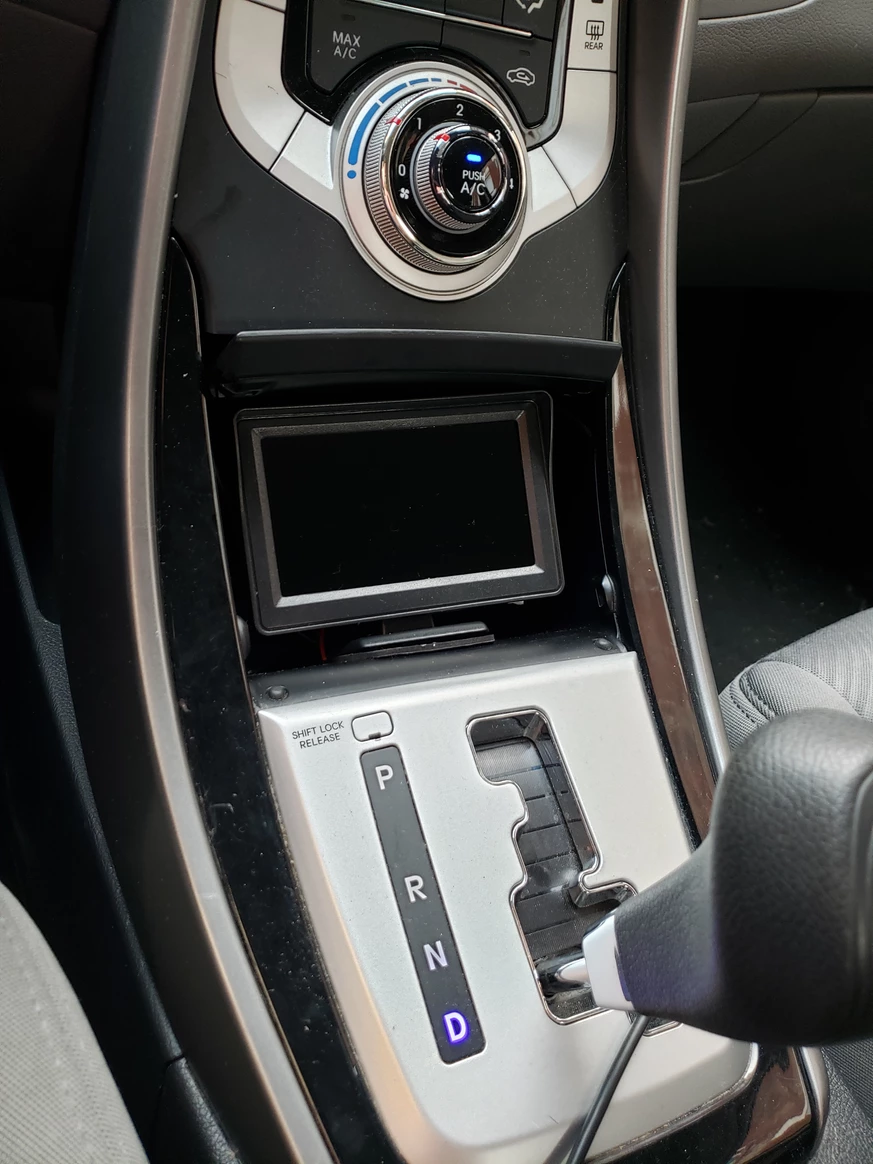
Using all this open space, I zip tied the two cables around the wheel and then under the vent, and then (with a lot of finangling) managed to push them into the center pocket between the lid and the side.
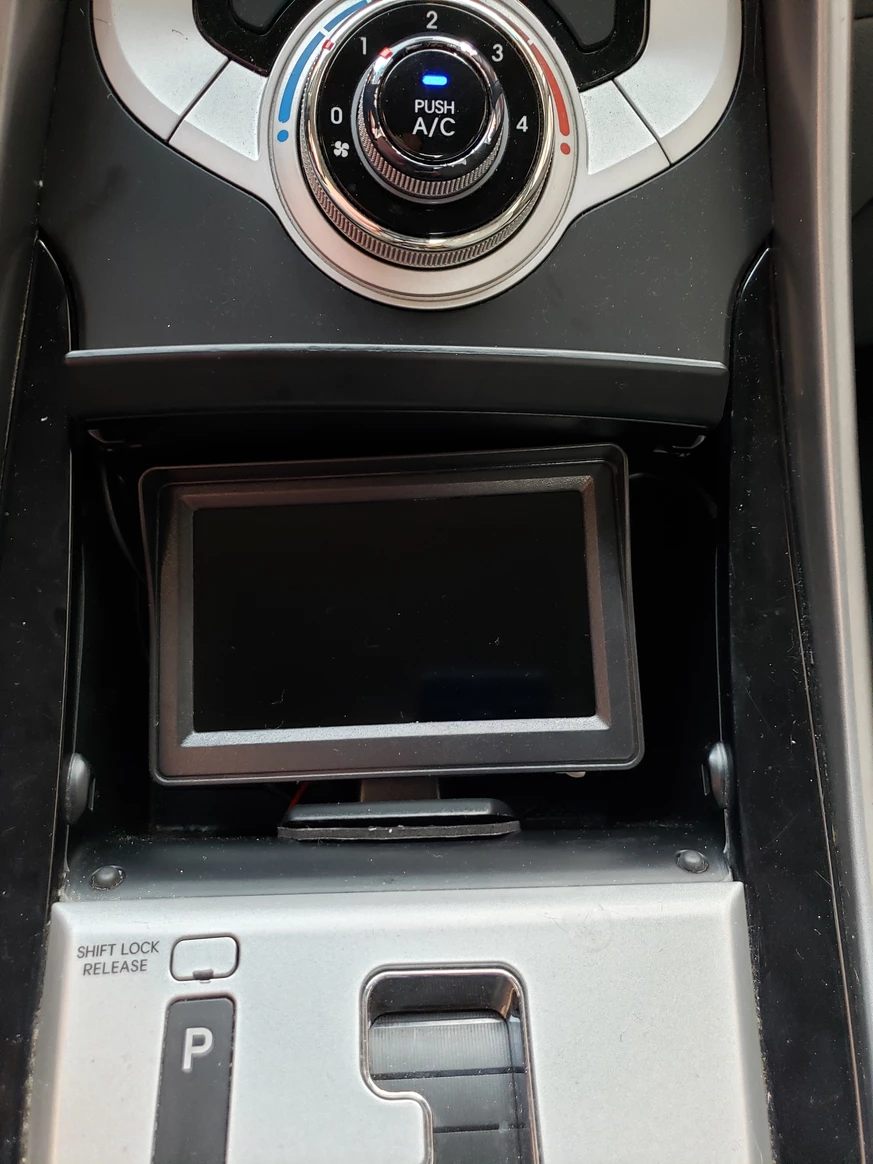
The final product
Timeline
- one month for the parts to arrive from AliExpress
- one week for the replacement display to arrive from Amazon (don't use AliExpress)
- one lunch break to install camera and attempt to locate wiring
- one afternoon of extensive research to figure out if I identified the tail light wiring correctly while being unable to test with my multimeter
- one dark evening in an alley to actually wire up the camera
- one lunch break-turned-entire-day to route the wiring through the trim and power the display from the fuse box (and break the hood opener latch)
Some additional notes
The stock radio in the 2012 Elantra does not have a video display, but you may have added your own fancy radio or be thinking of upgrading. Most of the new radios with displays have an input for a backup camera video feed, so I recommend doing research about this. My backup camera video cable has a small red wire coming off of it. I did not need to use it for my configuration, but this may need to be wired to the 12V reverse light as well if you are using a different kind of display.
I chose to use the small 4.3" display because it fit so well into the center pocket of the Elantra. If you want to do this for another car, you may want to choose a different display. A lot of people like to buy review mirrors that have a display built into them like this one. It only shows the display when the car is in reverse.
Other options
If you read through all this and it seems a little difficult for you, there are other options. I spent about $50 on parts, and then $50 on parts and tools that some people might already have laying around, and probably used another $50 worth of parts and tools that I actually did already have laying around. If you don't already have tools to do this type of work, there are a lot of plug-and-play kits for less than $100 on Amazon. It would be great if you use my referral link when you go to purchase your kit.