How To Build An Impromptu Pebble Charger
Published October 20th, 2022 by Emily
Stop me if this has happened to you before: You arrive in a foreign country after 24 hours of traveling, go to charge your smartwatch and realize you dropped your charger in the airport.
No problem, right? Go to the store and buy a new one. Or just buy order one on Amazon... No such luck. This smartwatch is a Pebble, a company that went out of business in 2016. No stores carry chargers like this anymore and it would take three months to ship to the location of your travels.
This is exactly what happened to me a few weeks ago. I was in a hostel in Lisbon and I realized I had no way to charge my favorite smartwatch for the next two weeks of our vacation.
I pouted for a while, but then I had an idea. I found a local makerspace that was free and open to the public (shout out FabLab Lisboa), stopped at a consumer electronics store and a hardware store, and brought my supplies to the FabLab's soldering station.
Here's what you'll need
Some of these things I bought, and some the FabLab made available to me.- Pretty much any type of USB cable. I used a cheap lightning cable.
- Something to cover the wires with. I used electrical tape but, if it's available, a heat gun and heat shrink will work best.
- Something to strip wires with. A wire stripper is easiest but you could even use a box cutter for this.
- Something to connect the wire to the charging ports. I'll explain a little later.
- A soldering iron and solder. This is technically optional, but it will make your charger much more reliable.
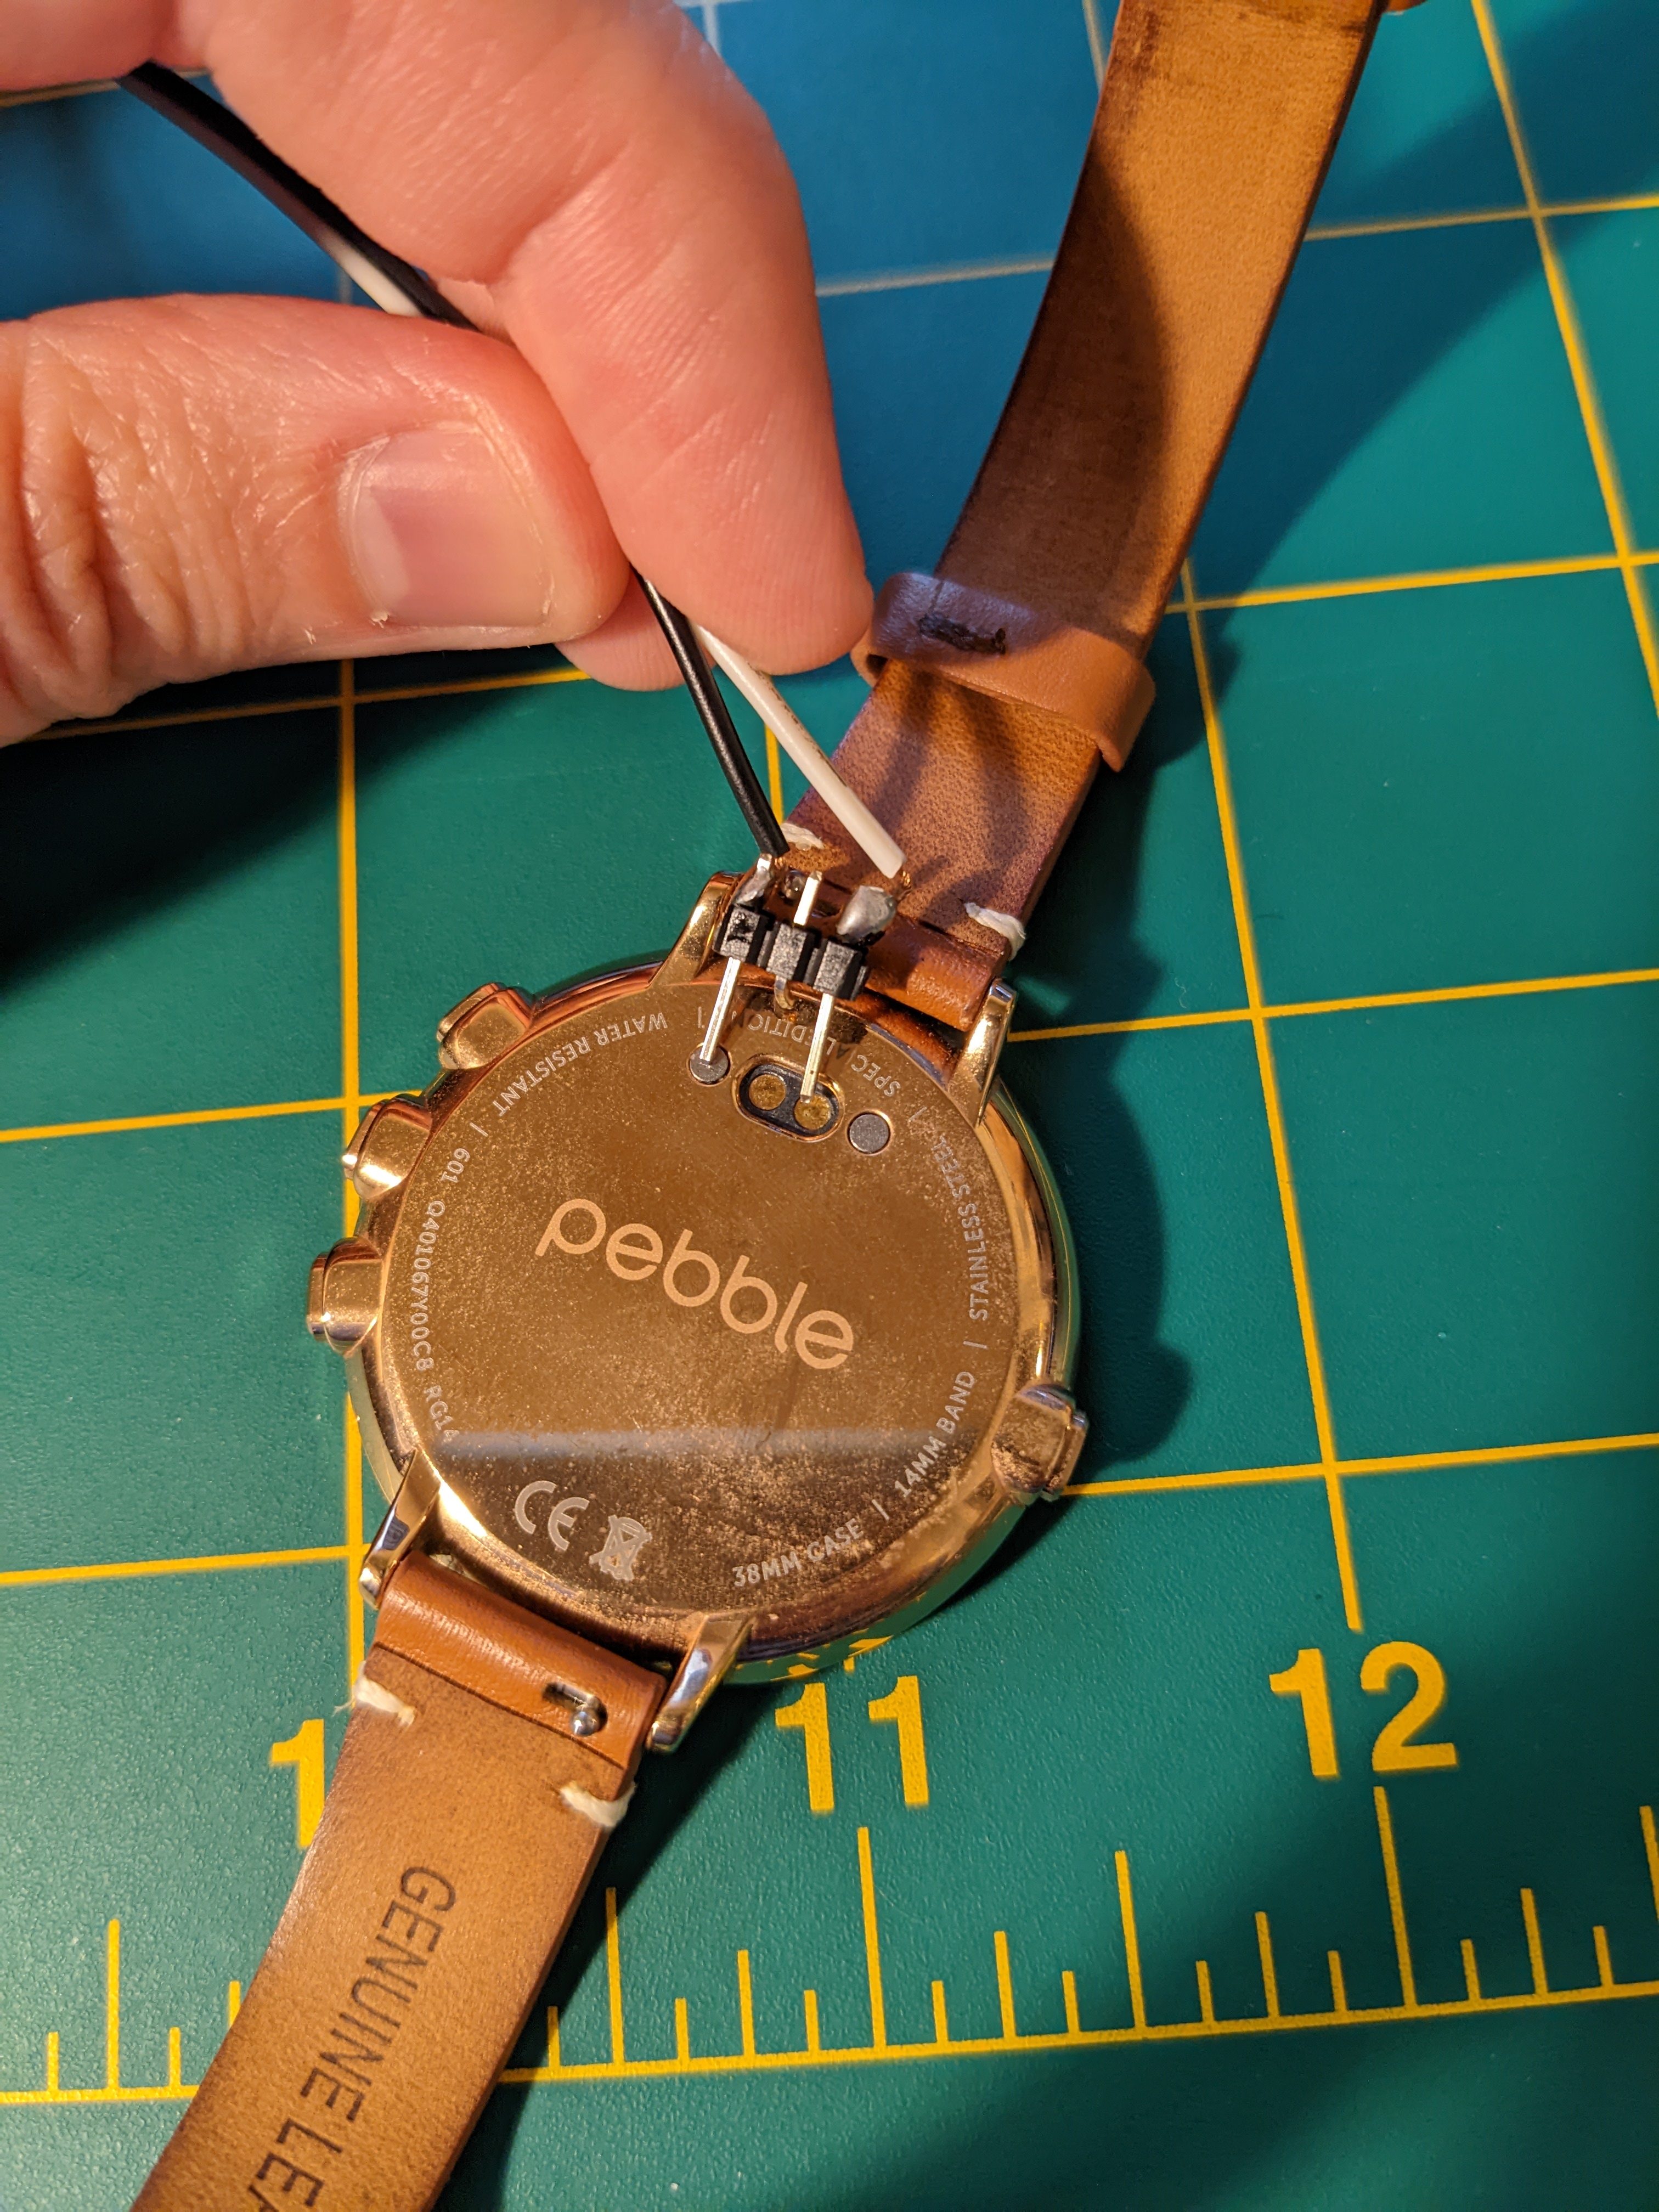
Take a look at your charger
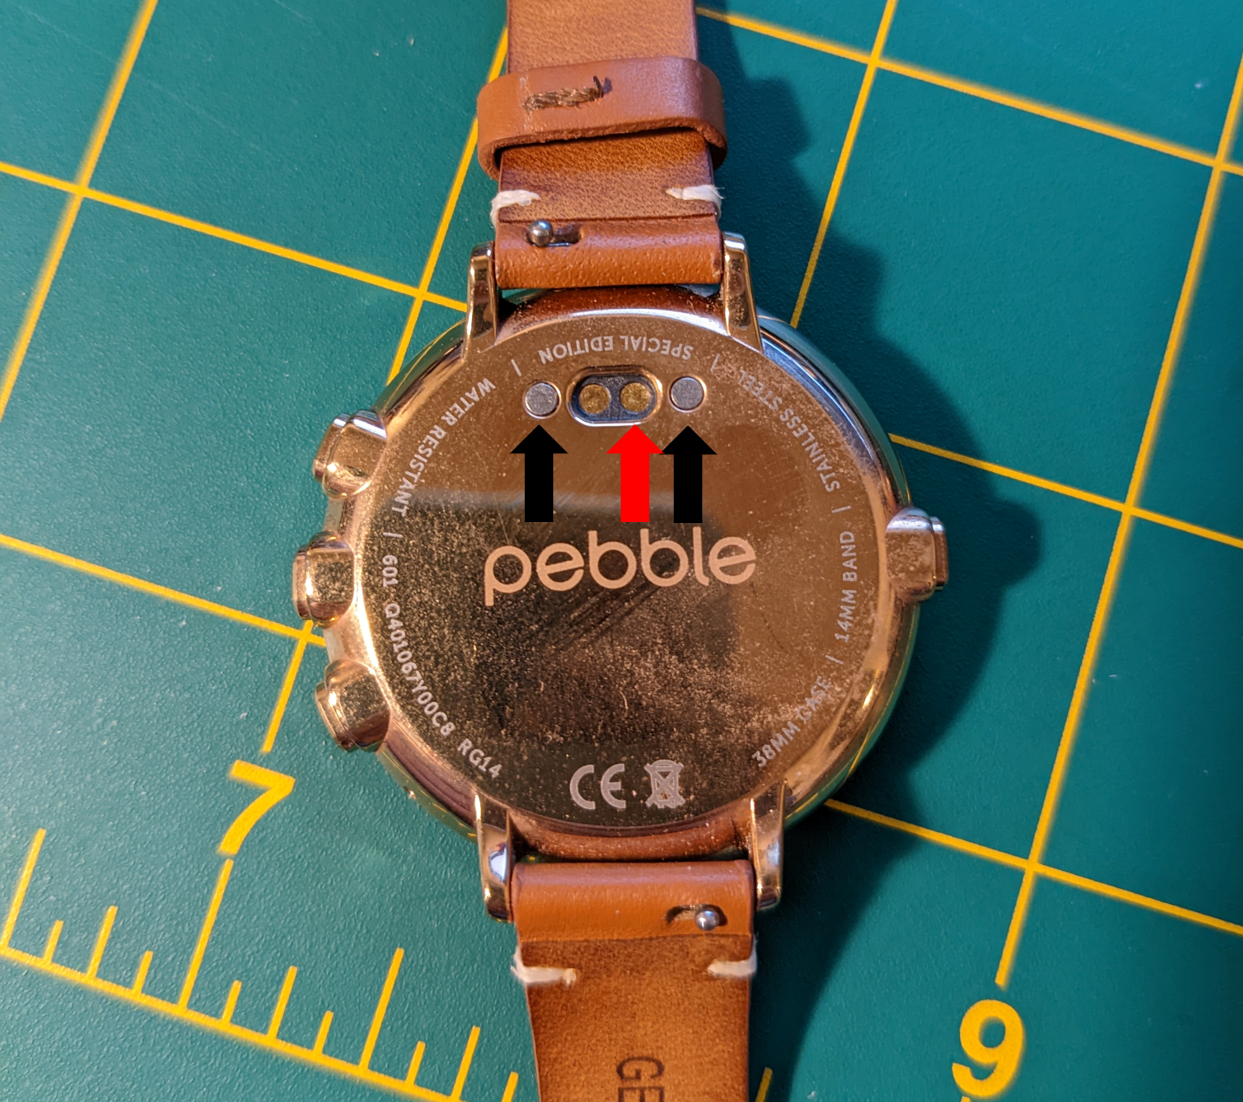
The two contacts with black arrows pointed towards them are magnetic. On your real charger, those are the two that keep it aligned. They also serve as the ground. The contact with the red arrow pointed to it is the voltage.
Strip your charging wire
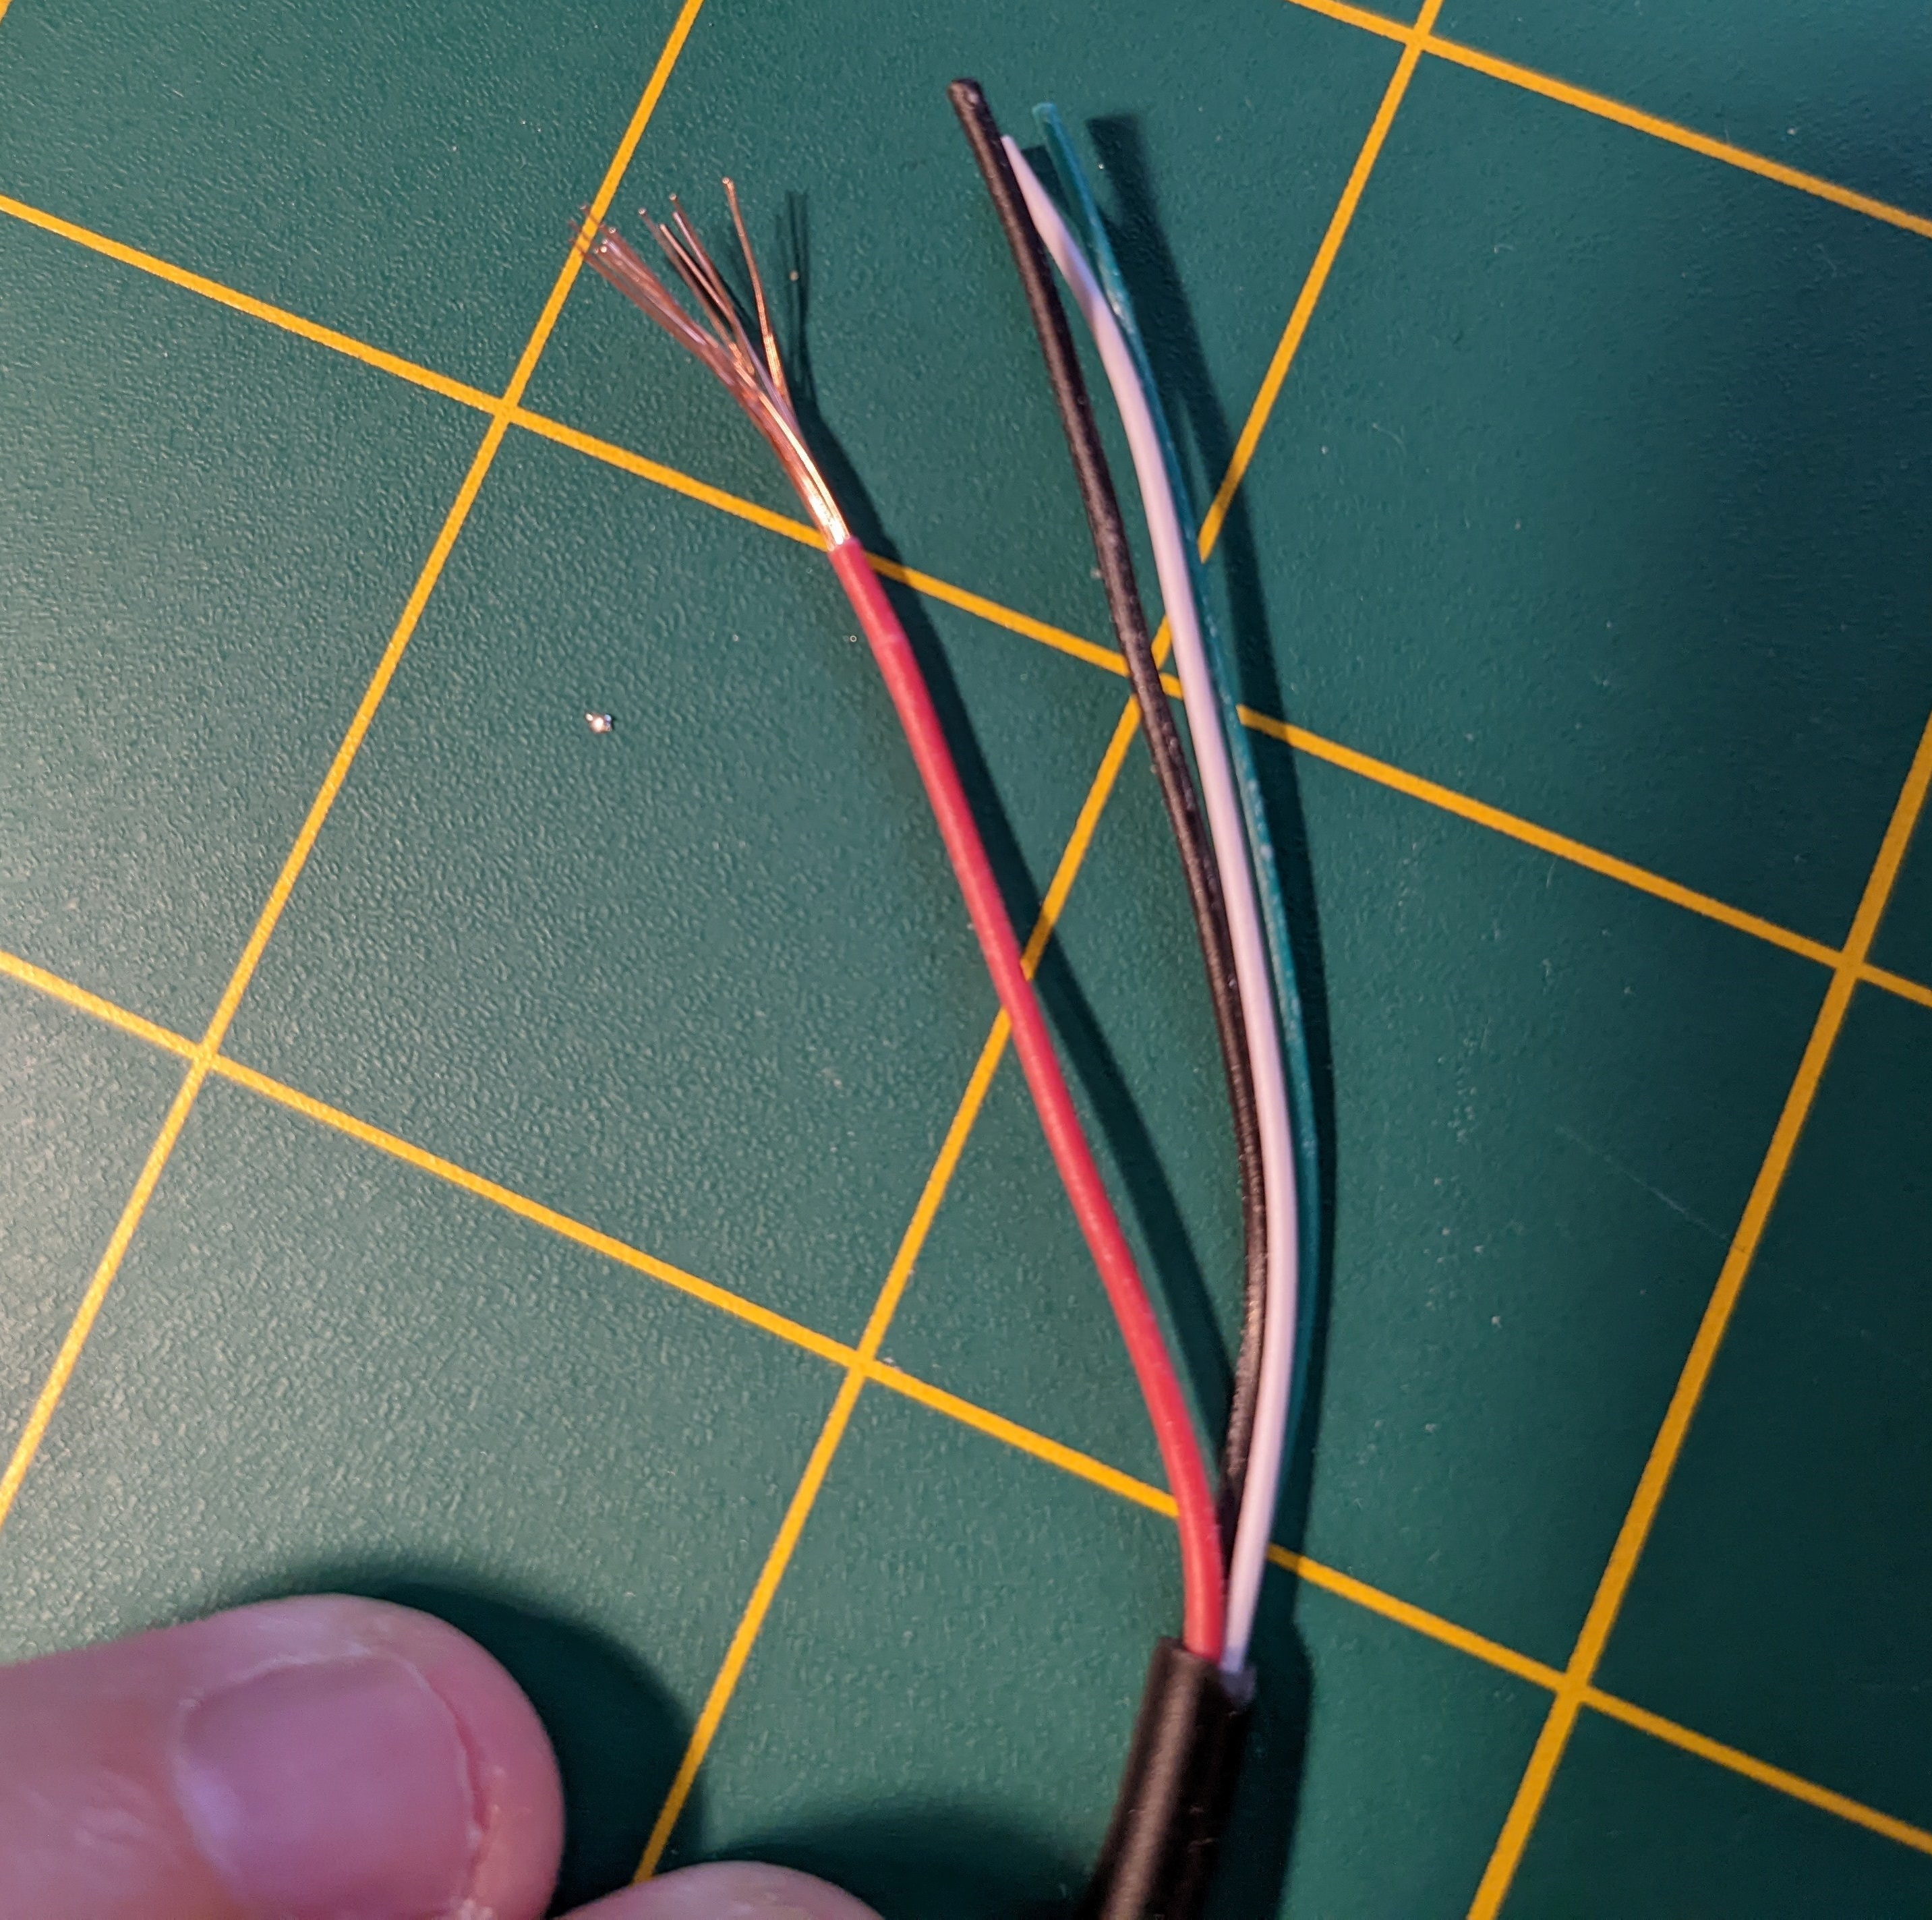
Your wire may vary, but it will at minimum have a voltage wire and a ground wire. Usually the voltage wire is red and the ground wire is black. You can trim all other wires short so they don't get in the way.
All we are going to do is devise a way to hold the red wire to the contact marked in red, and the black wire to one of the two contacts marked in black.
When you strip the voltage or ground wire you'll see that it is stranded. Technically you could just strip the red voltage wire and the black ground wire and then hold them on the appropriate contacts, but in practice this is very difficult. Getting a proper contact with two stranded wires onto the tiny charging contacts and holding them there is next to impossible. It took me about an hour to hold the wires in exactly the right place to get a full charge, and it should only take about 15 minutes with a proper charger. I needed to find a better way.
Turns out, there are two better ways
Both ways you're going to have to connect your stranded wires to something else, but what that other thing is will depend on what you have available.
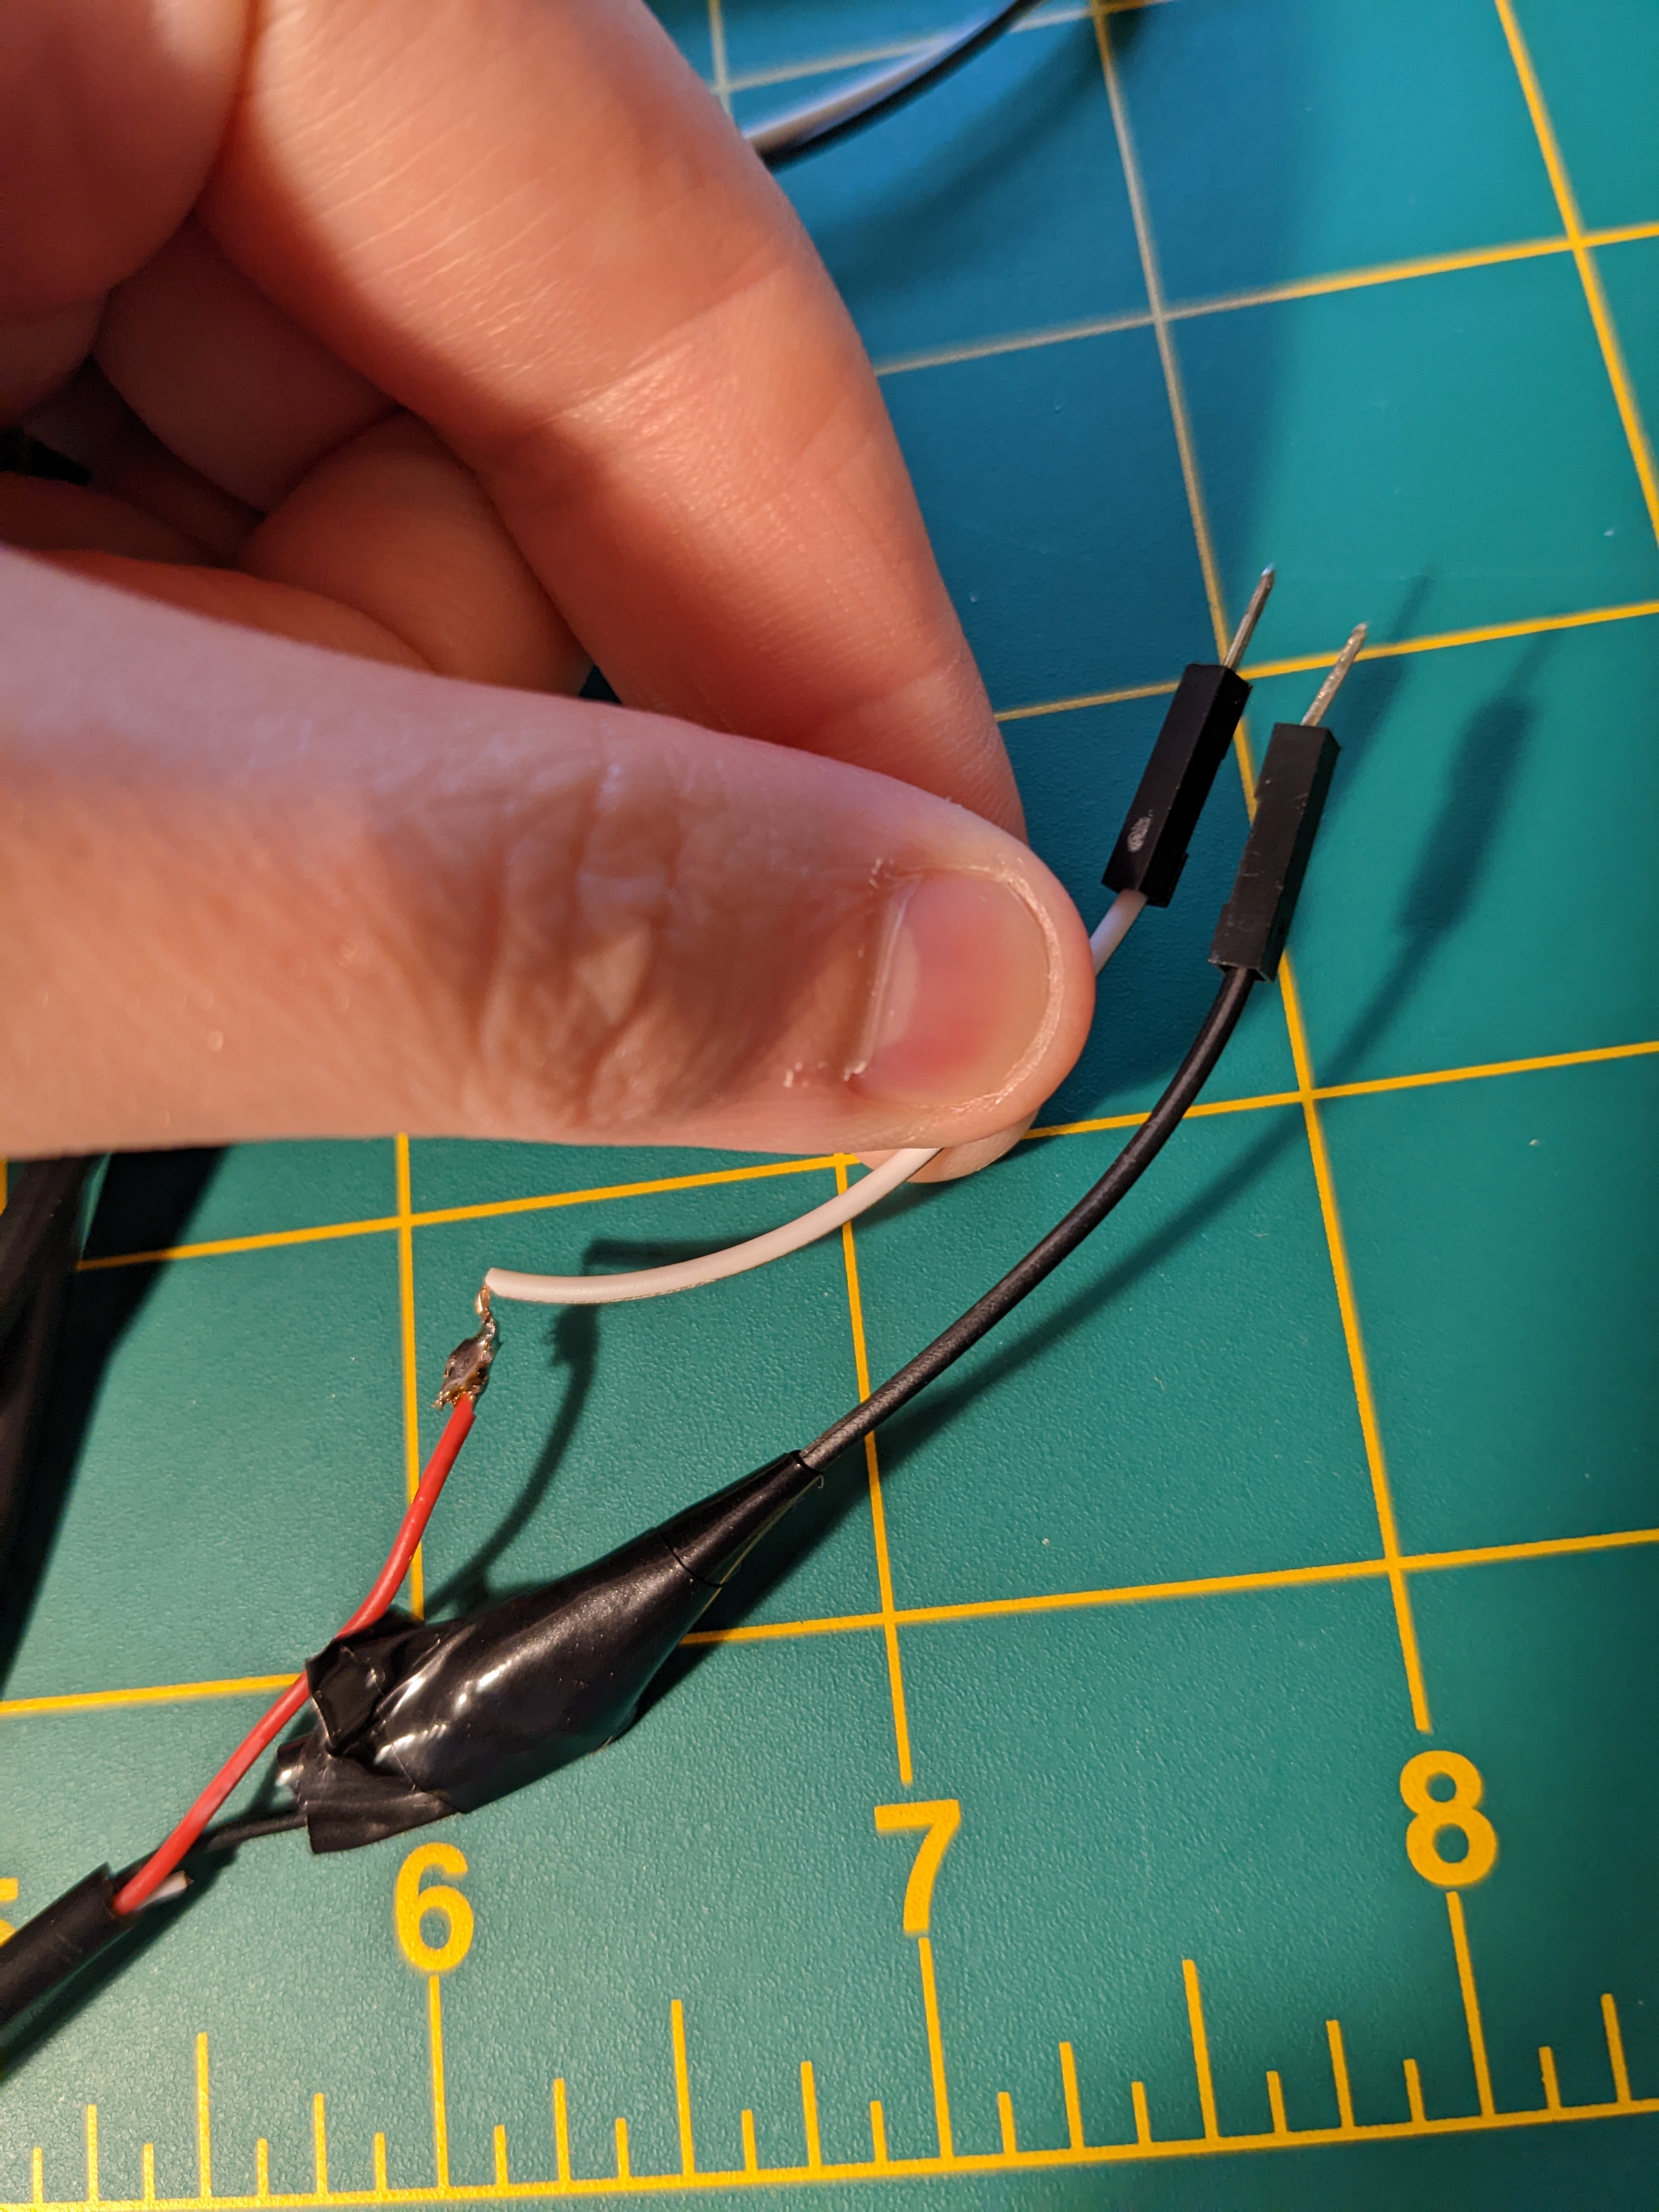
Option 1: Connecting the stranded wires directly to solid wires (the less desirable option)
I recommend this option only if you don't have a soldering iron or a male-to-male header available.
It's very likely that your makerspace has something like the wire below hanging around. The key is that the end of the wire is solid and stiff, and easy to push against the Pebble's charging contacts.
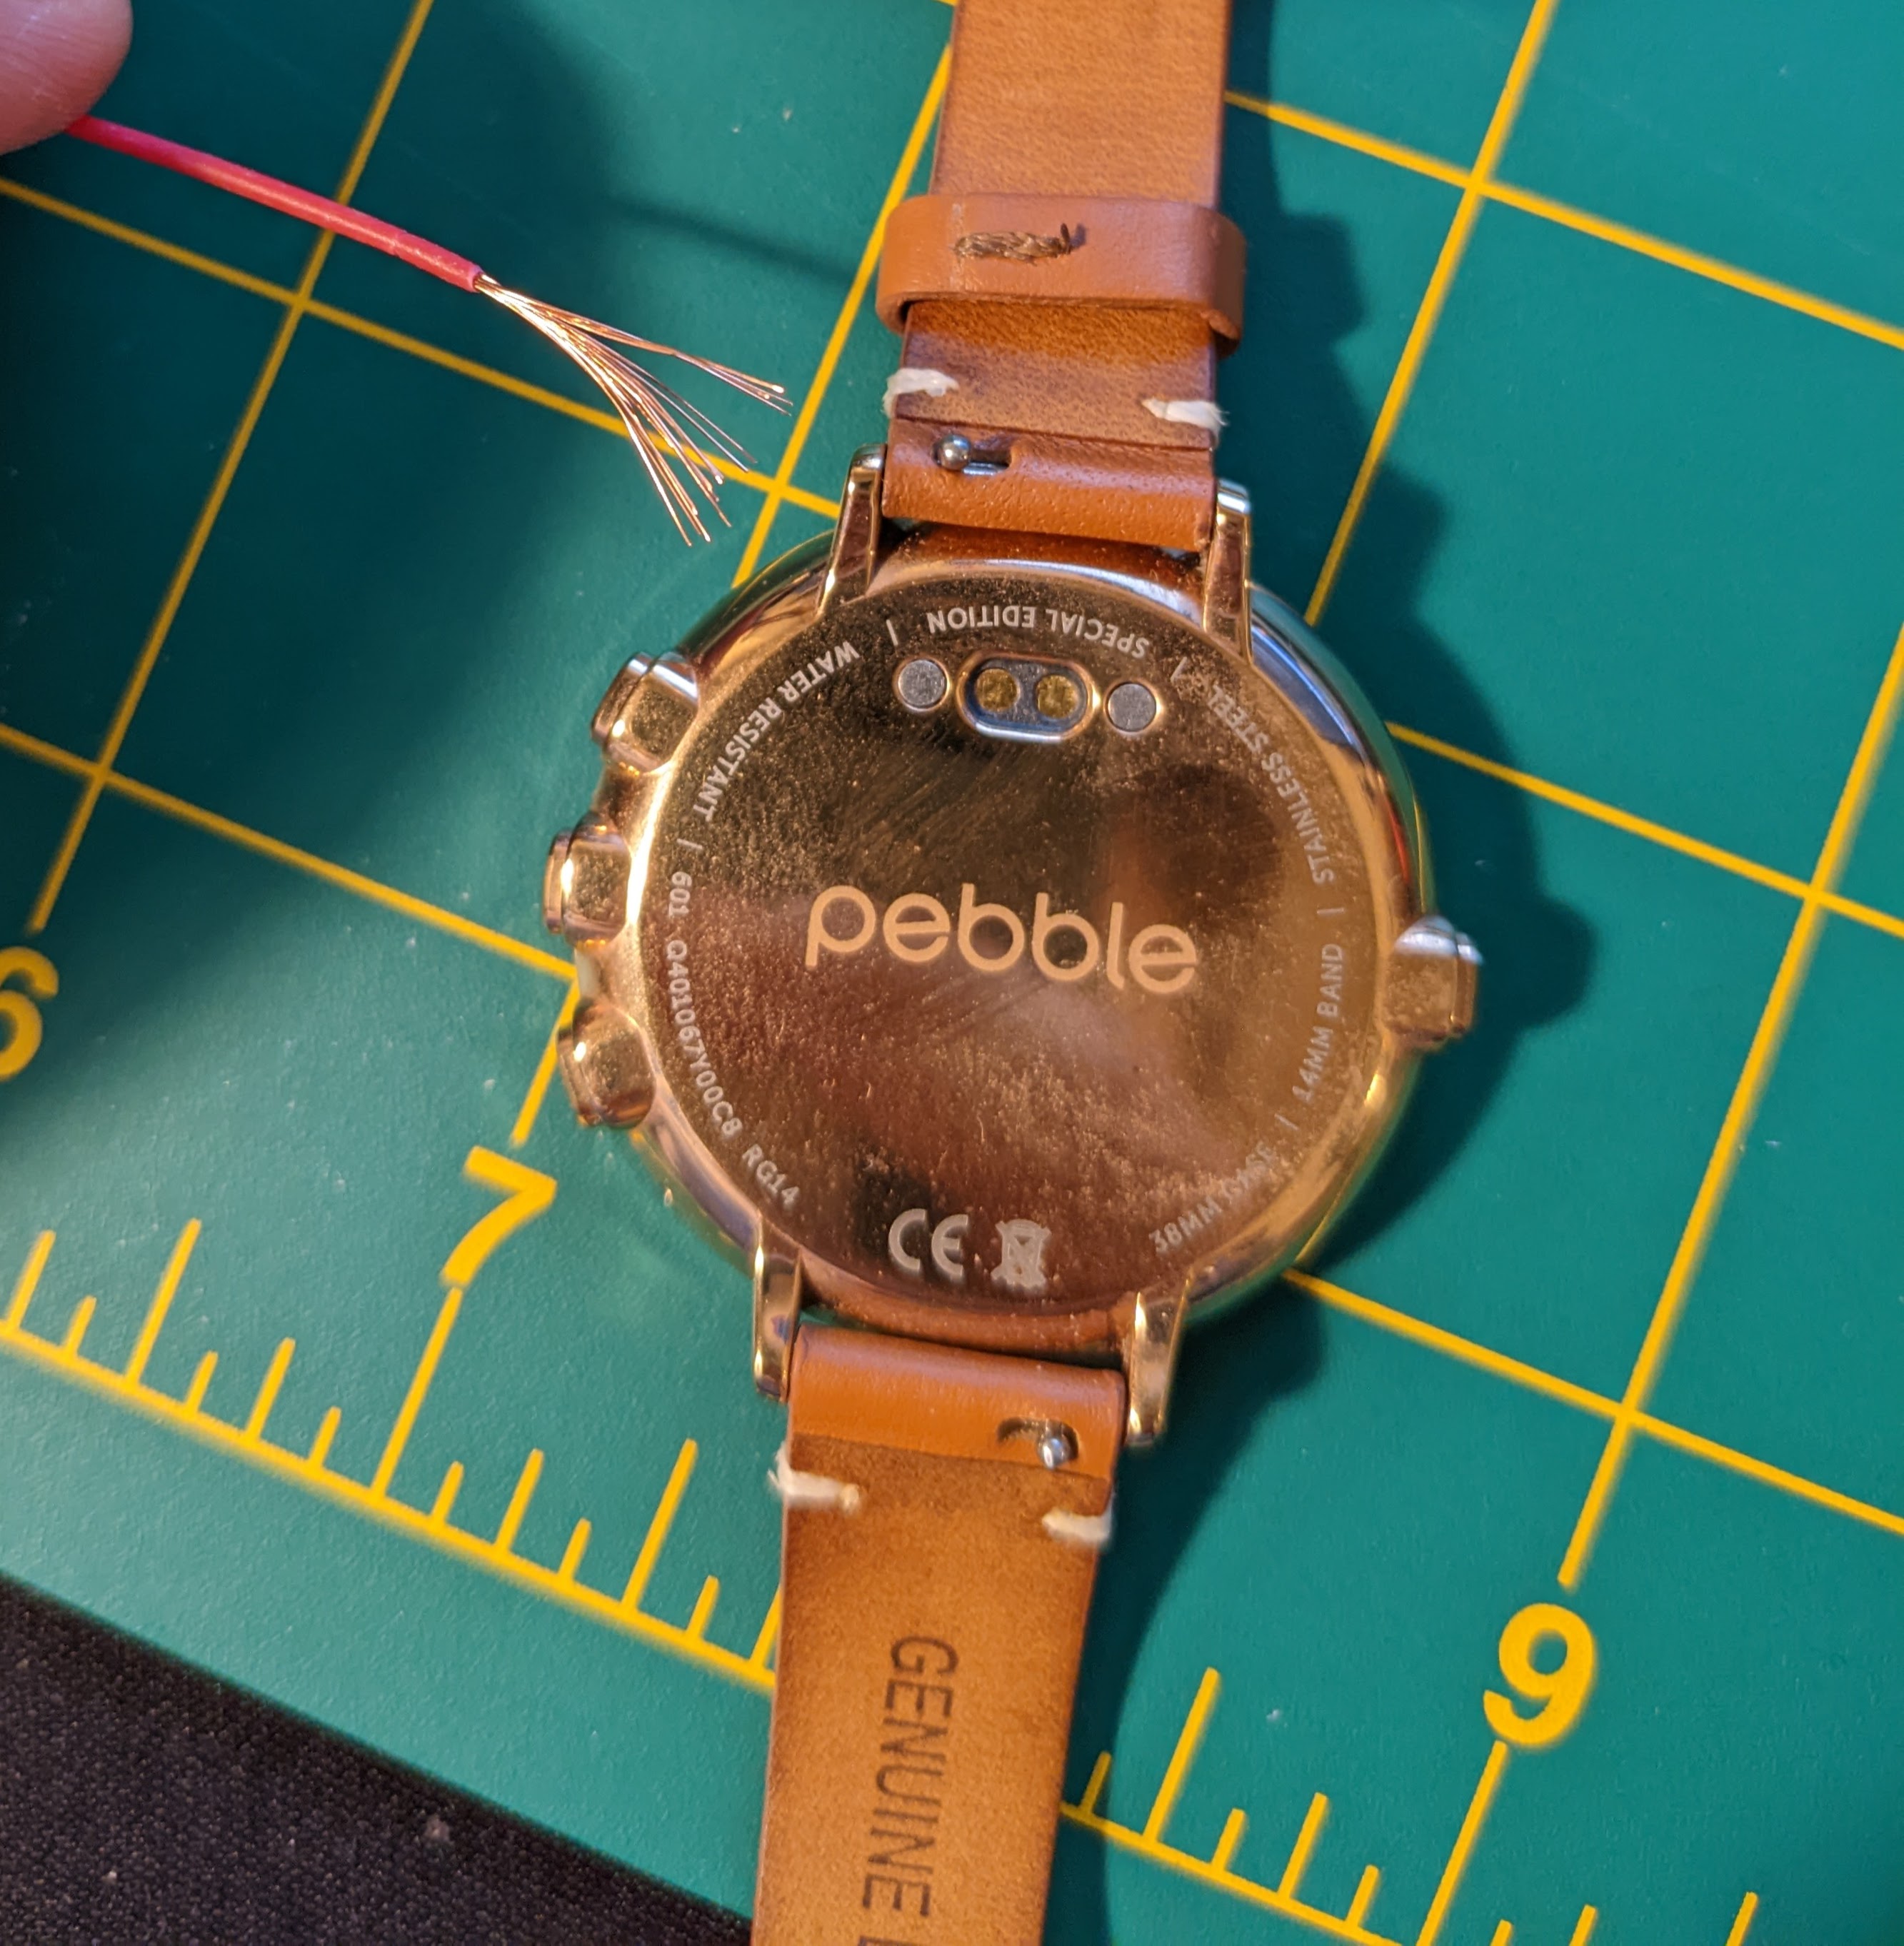
With your soldering iron, solder the stranded wires to the solid wires, and then cover them either with heat shrink or electrical tape. You can then push the hard ends of the solid wire onto the contacts of the Pebble and hold them there to charge. You will need to keep your hands steady to make sure they don't move off the tiny contacts. If your hands and the wires make contact with the wrong pads, you may see some sparks. Your Pebble battery won't immediately die, but I don't recommend doing this too many times.
If you don't have a soldering iron, you can do what's called a military splice. See this page for instructions.
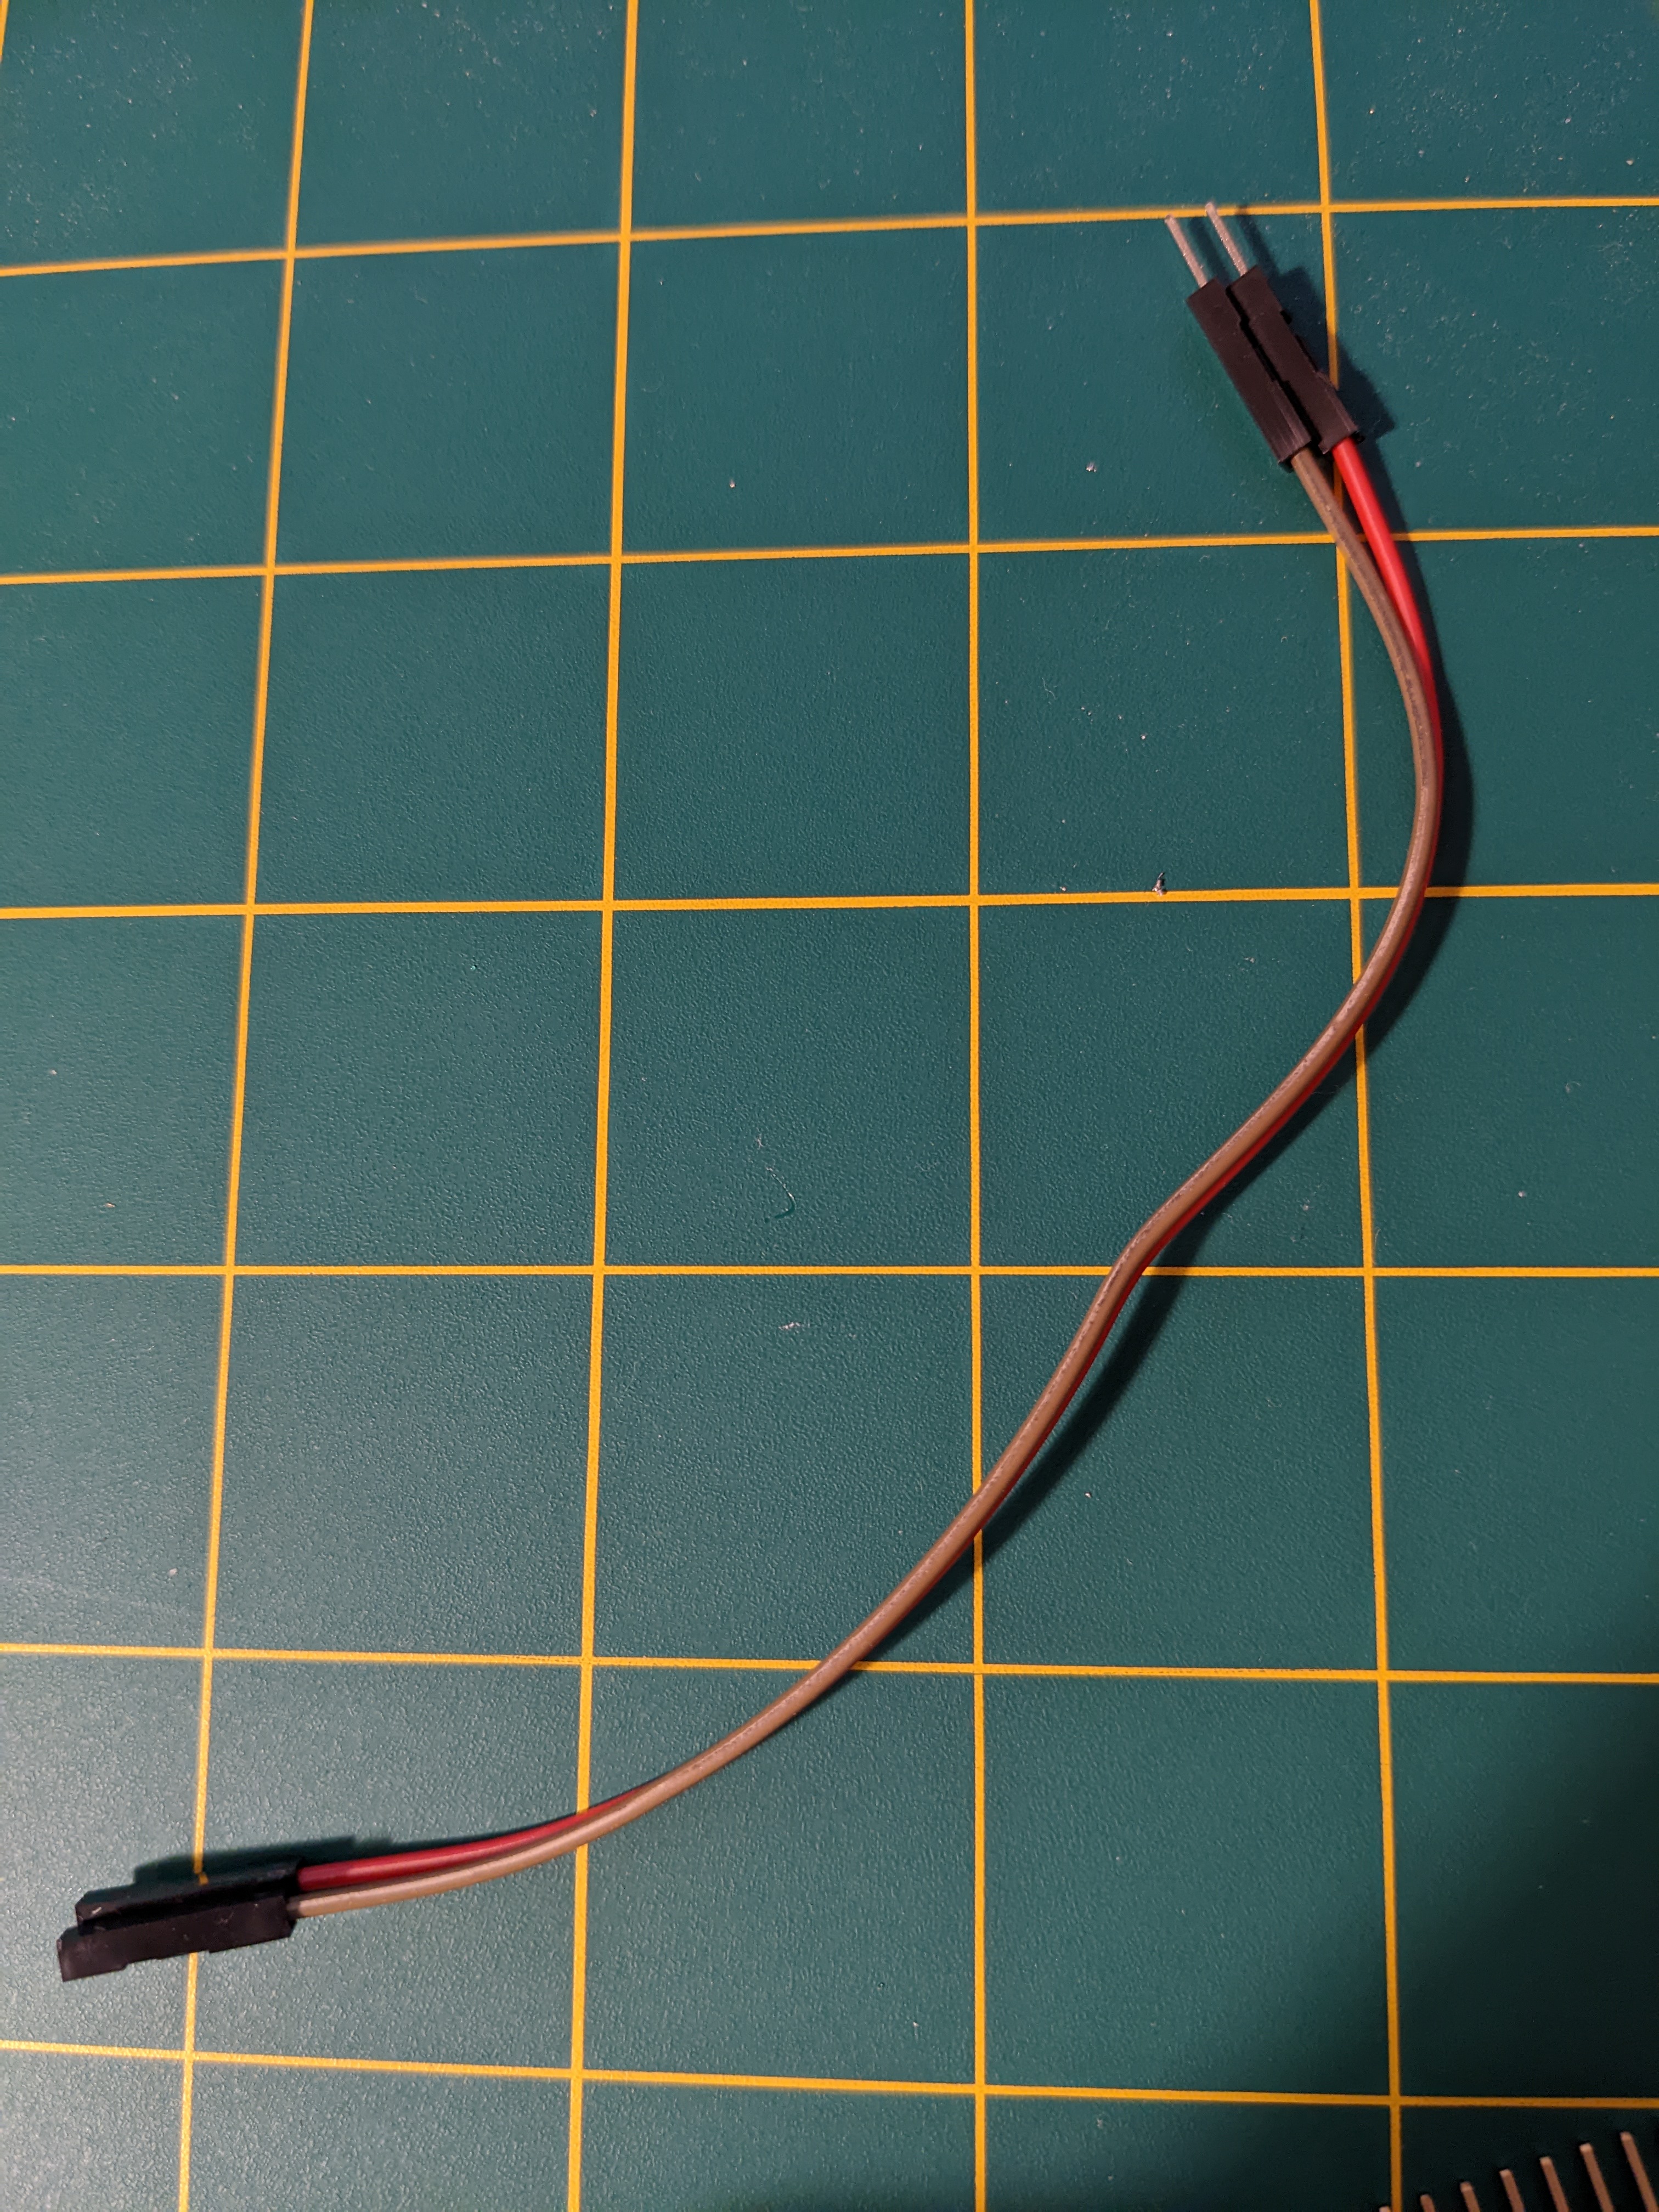
Option 2: Connecting the stranded wires to a header
This option utilizes a wire header. This is also commonly available in makerspaces.
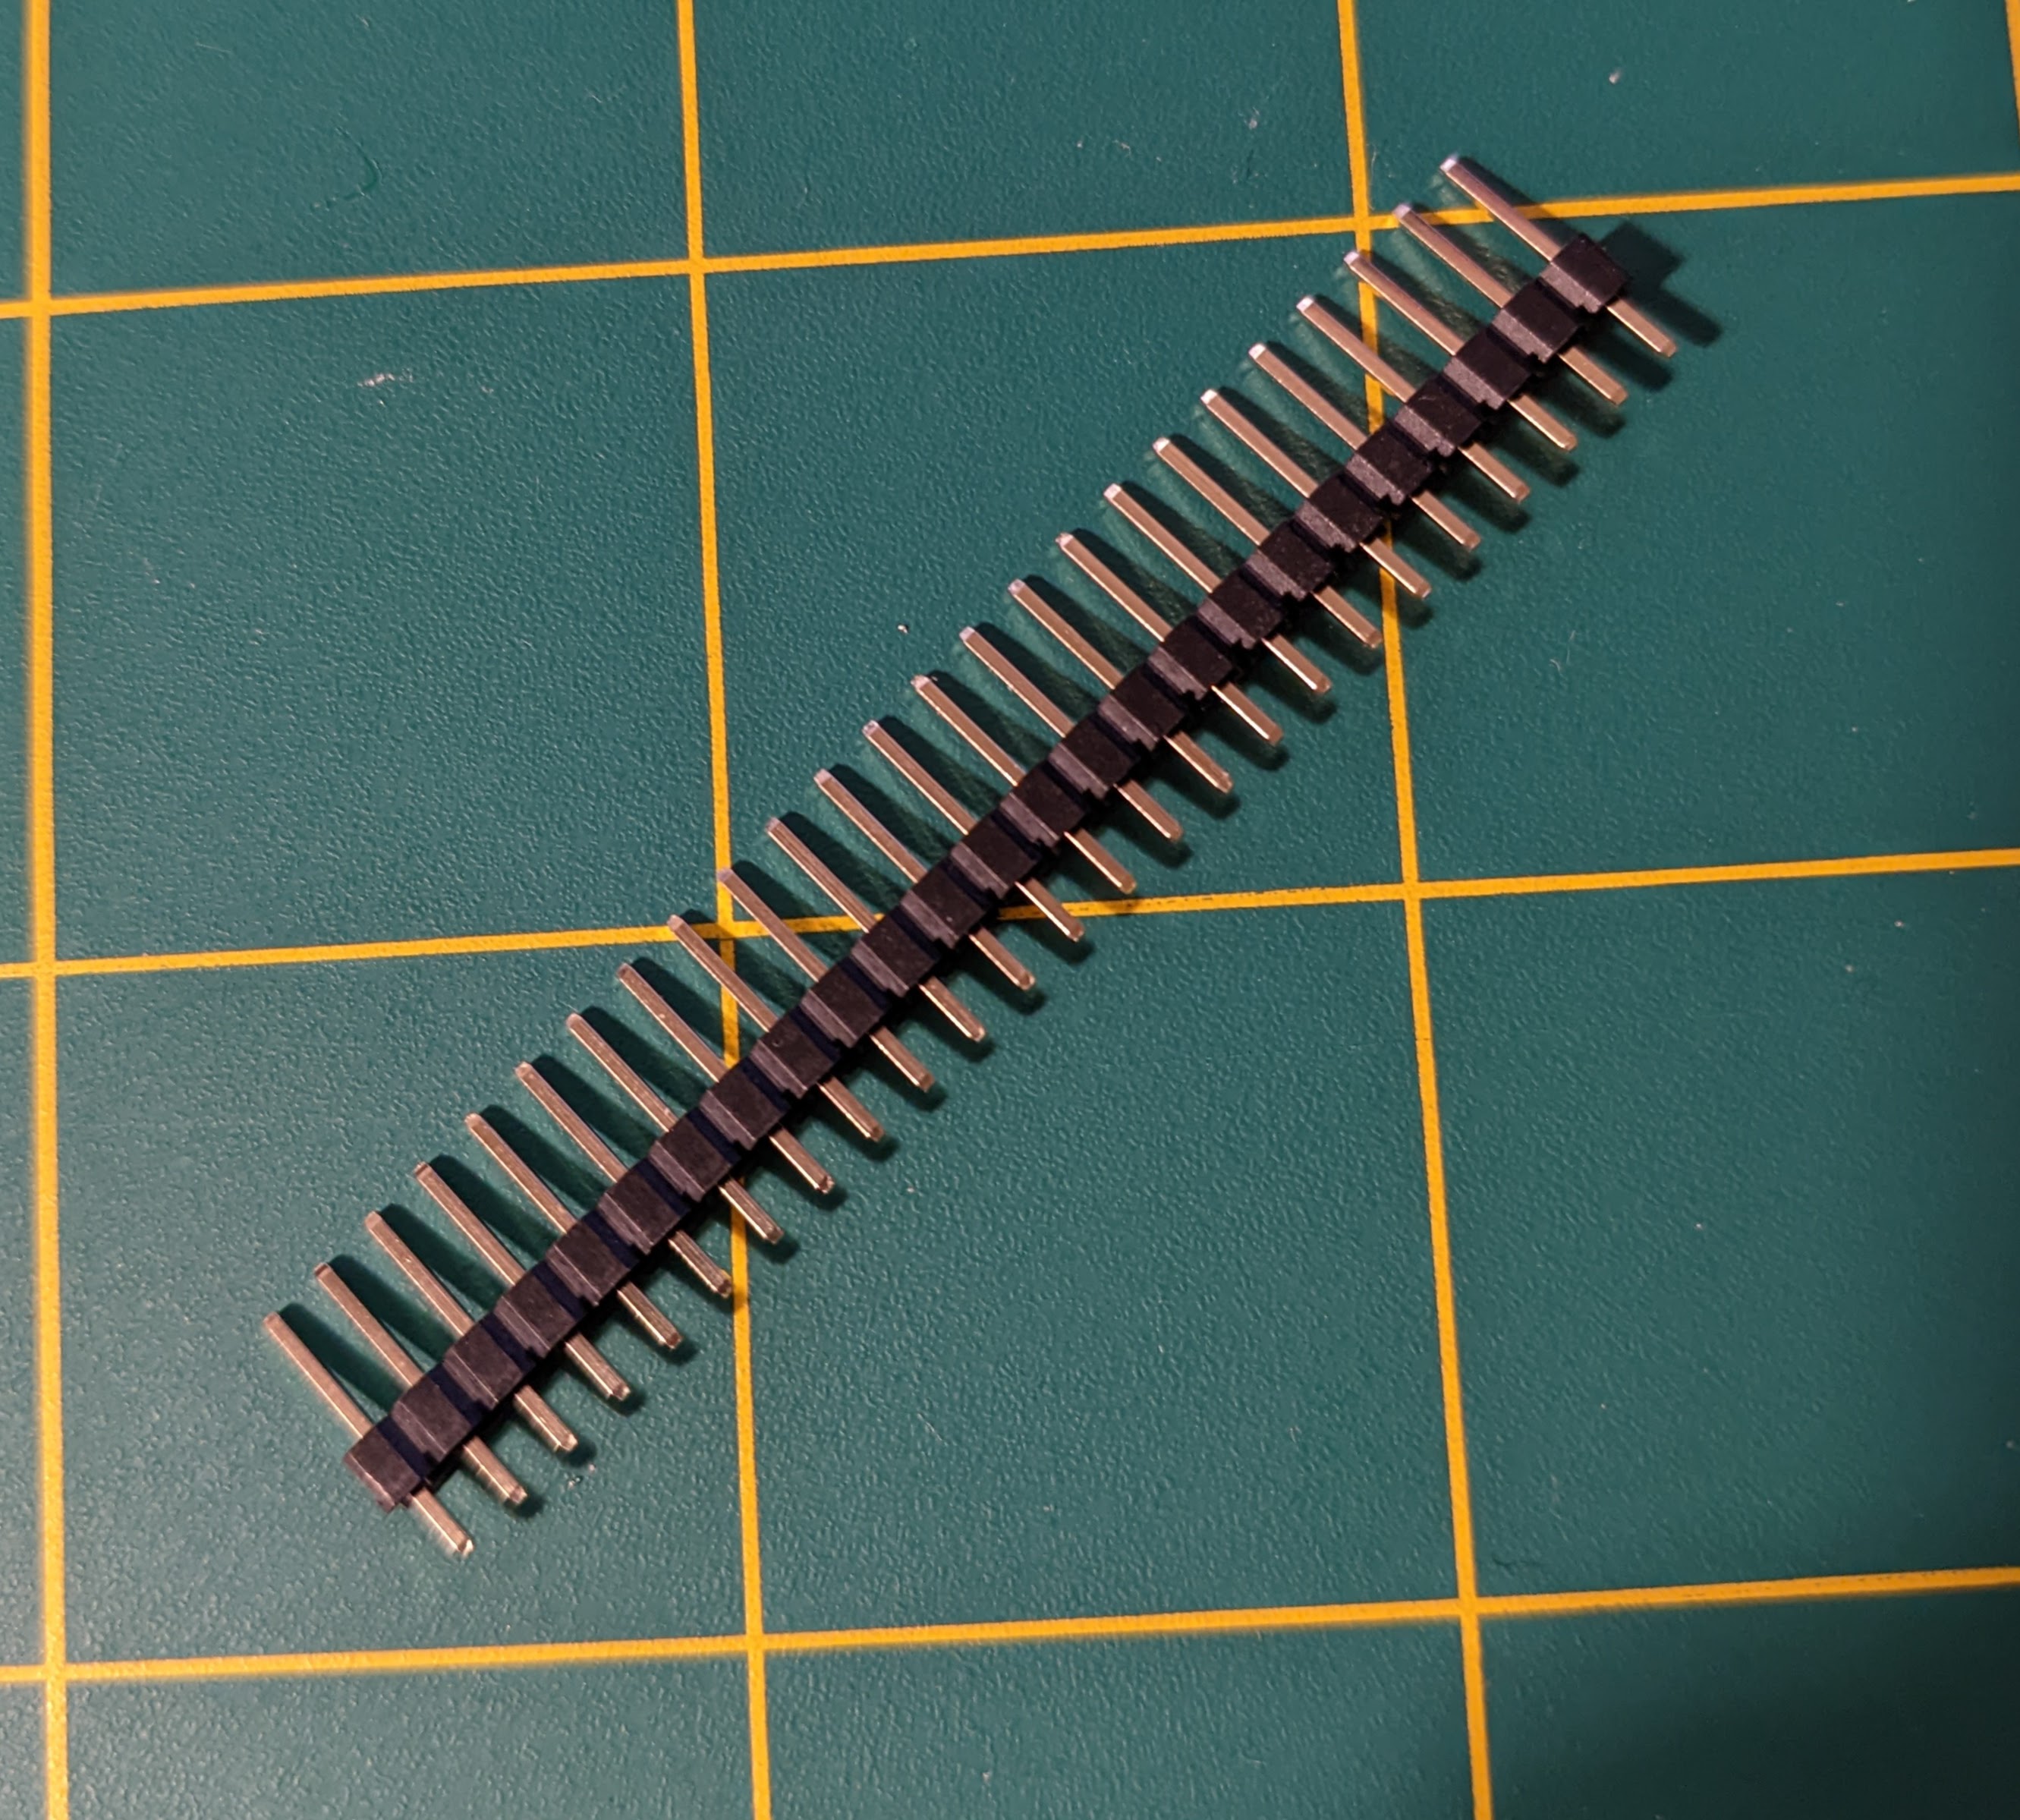
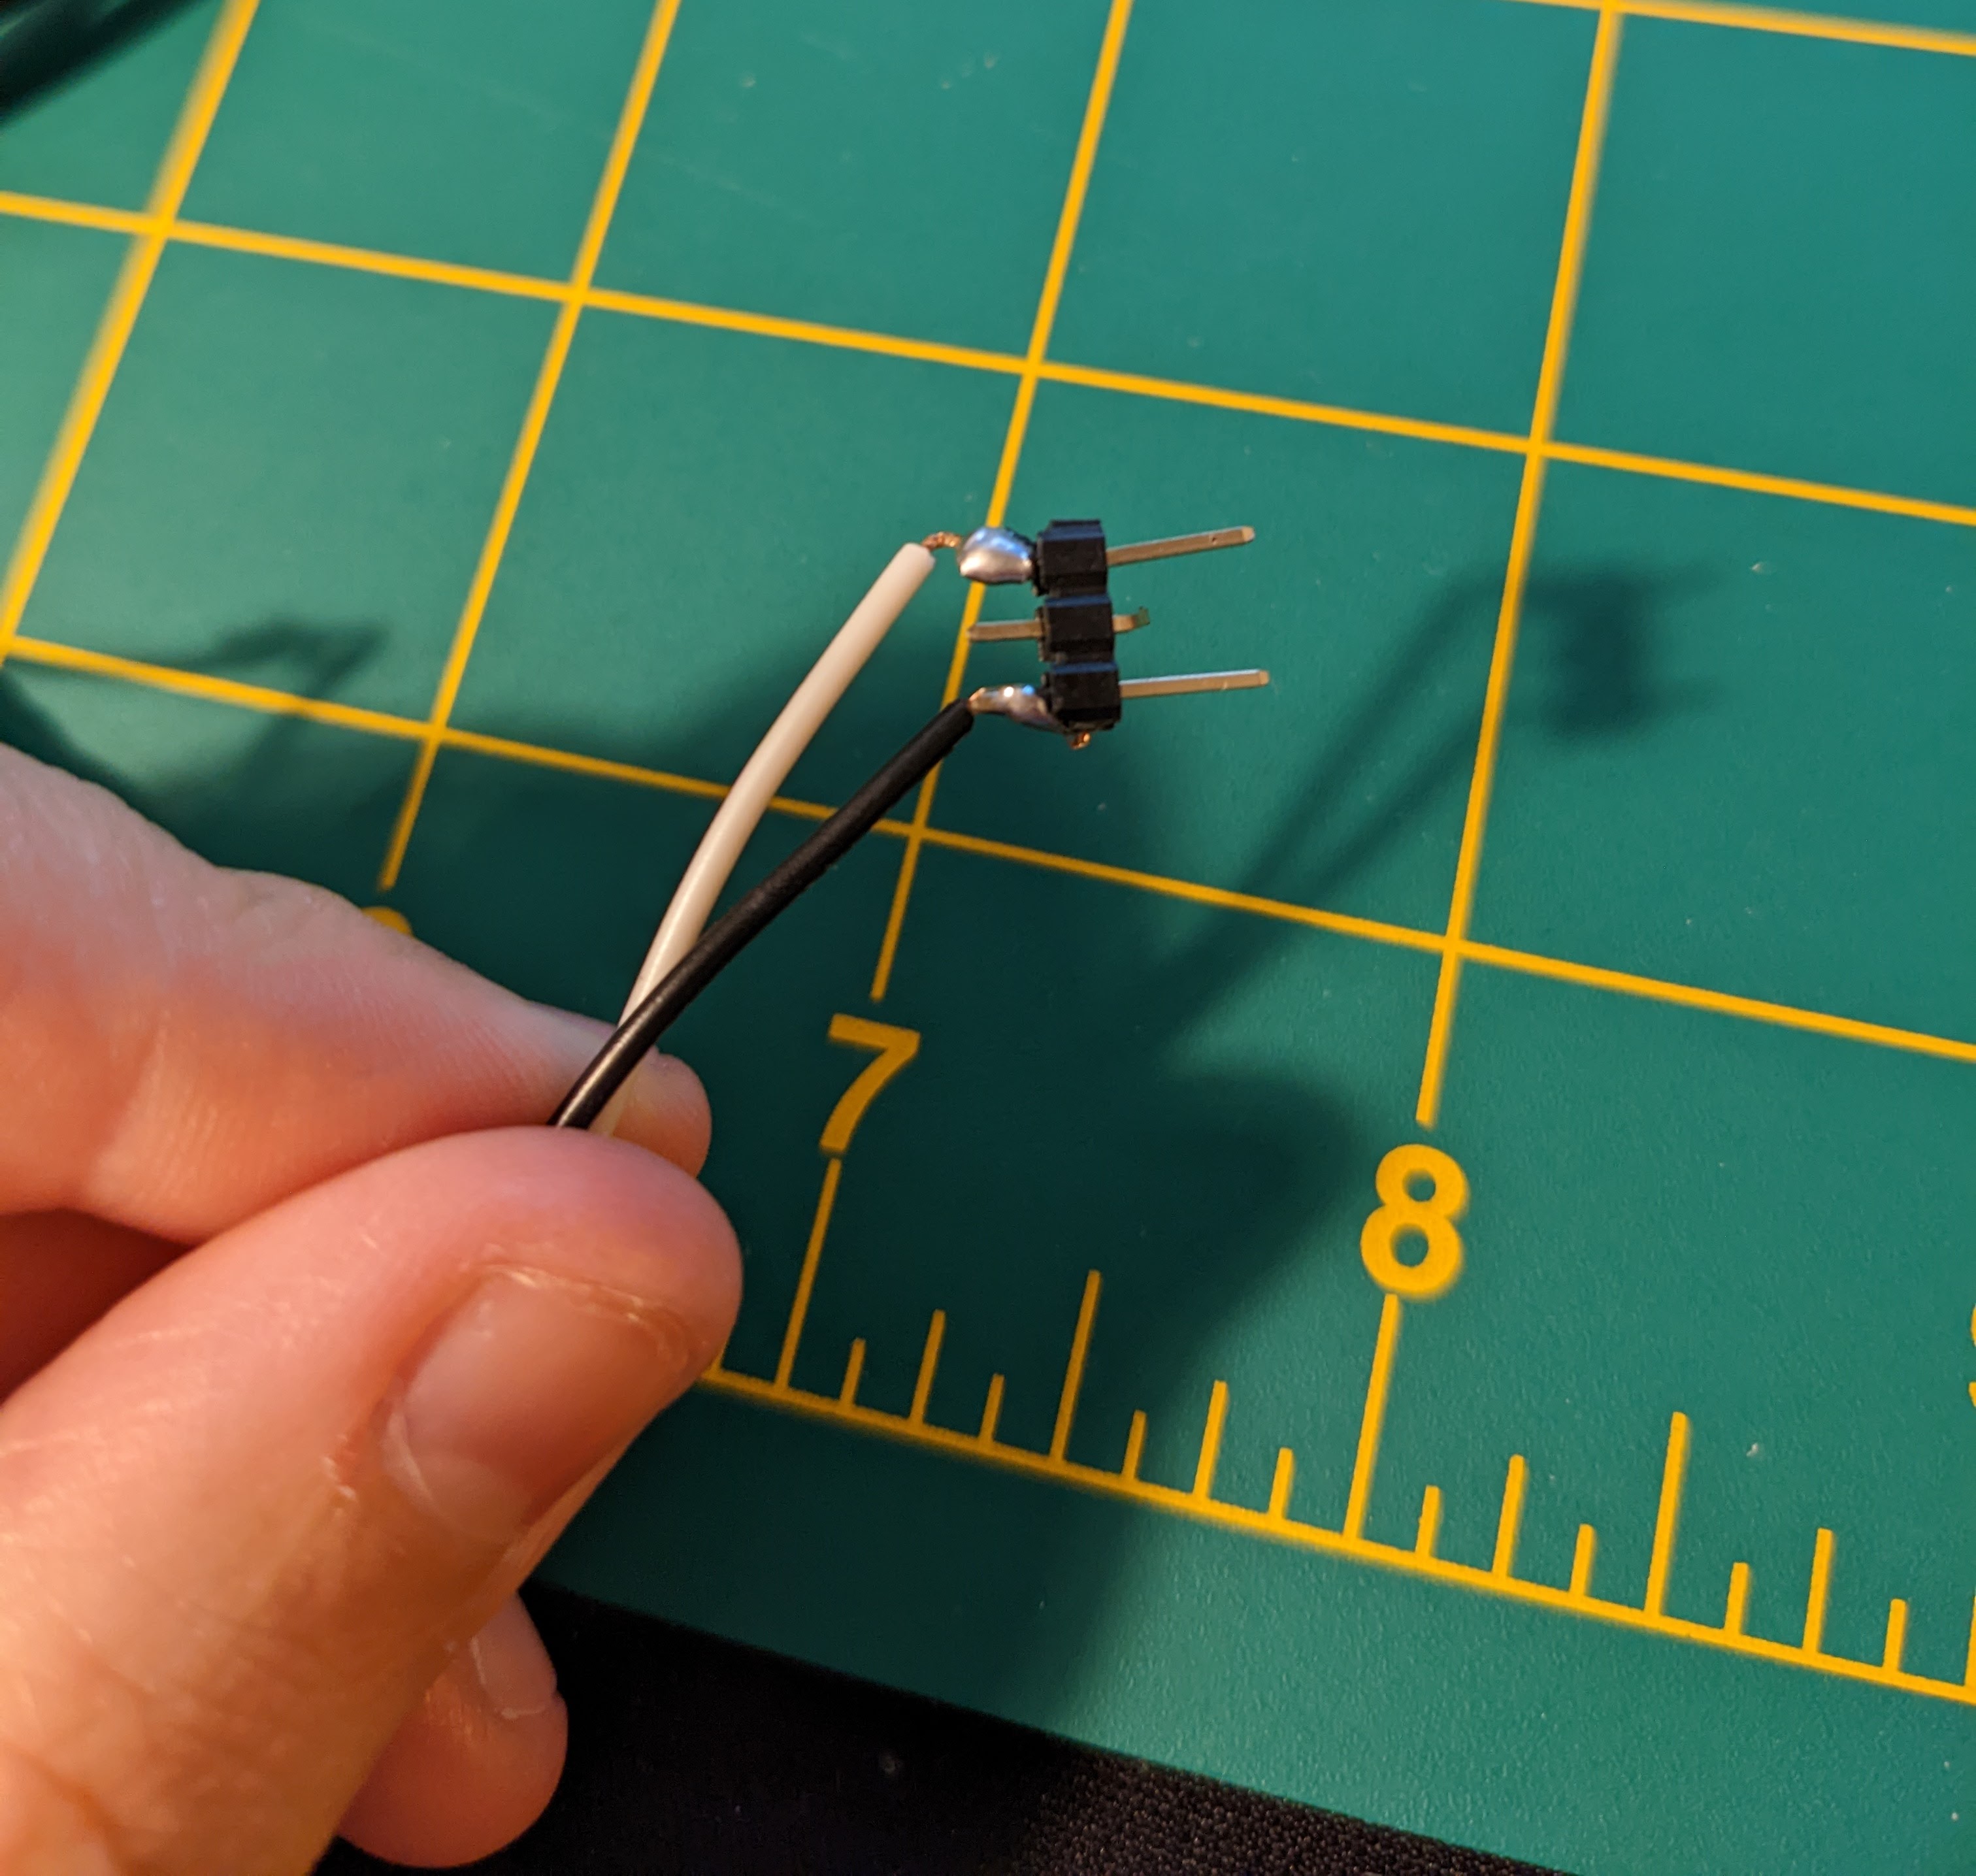
I snipped off a section of three pins and then soldered my stranded wires to the outer two. I was able to bend the outer two pins so their width was equal to the distance between charging contacts, and I trimmed the center pin. This makes holding the DIY charger to your Pebble much easier.
Here's the header charging contraption by itself.
You will not be able to do a military splice with this configuration because the pins are too rigid to be wrapped with the stranded wire.
Good luck!
Your mileage may vary with this. I couldn't believe my luck when I found a makerspace that was free and open to the public the very next day (they definitely don't have anything like that where I'm from), and doing this in my hostel with a box cutter, electrical tape, and some wire was very difficult.
Be warned: after doing this for two weeks I am pretty sure my battery has a slightly lower capacity than it did before. This could be due to the shorts (sparks) caused by an imperfect connection between the Pebble and the DIY charger. Another possible reason is that unlike with a regular charger, where the magents hold the watch onto the charger for the entire duration, your hand will likely slip several times during the course of the charging and that connection-deconnection-connection-deconnection process may cause more wear to the battery. For those reasons I don't recommend using a DIY charger for any longer than absolutely necessary.